Step-by-step guide on how to activate an eSIM on iPhone before traveling — including the exact timing, settings to check, and what to do if installation fails.
Activating too early costs you real data. A 30-day validity clock starts the moment your eSIM goes live — not when your flight lands — so switching it on a week before departure burns seven days before you've left your driveway.
The opposite mistake is subtler. Activating at the airport, once you're already through customs and hunting for a taxi, means you're offline exactly when you need maps, a translation app, or your hotel confirmation. Charles de Gaulle Terminal 2E has notoriously patchy Wi-Fi past the arrivals gate; Suvarnabhumi in Bangkok is worse.
The setup itself takes under three minutes once you have your QR code — Apple's own documentation confirms iPhones support eSIM installation directly through Settings without any carrier app (Apple Support — Use eSIMs on iPhone). The timing around that three minutes is what this article is actually about. Follow the installation guide to handle the technical steps, then come back here to understand when each step should happen relative to your departure.
Check your iPhone is eSIM-compatible
Every iPhone from the XS (2018) onward supports eSIM — that covers the XS, XS Max, XR, the full 11 through 16 lineup, and every SE from the second generation forward (Apple Support — iPhone models that support eSIM). Older models simply don't have the embedded SIM hardware, full stop.
Carrier lock is the second variable. A locked iPhone will reject any eSIM outside the carrier it's tied to, which kills the whole plan before you board. Check by going to Settings > General > About > and scrolling to "Carrier Lock" — if it reads "No SIM restrictions," you're clear. If it shows a carrier name, contact that carrier to request an unlock before your trip.
Practical rule: Confirm carrier lock status at least 72 hours before departure. Unlock requests can take up to two business days to process, and some carriers won't expedite them.
The eSIM slot count matters too. iPhone 13 and later support multiple eSIMs stored simultaneously (Apple Support — Use two SIMs on iPhone), so you can keep your home plan dormant while running a travel eSIM — no deletion required.
Install and activate your eSIM at home — the step-by-step
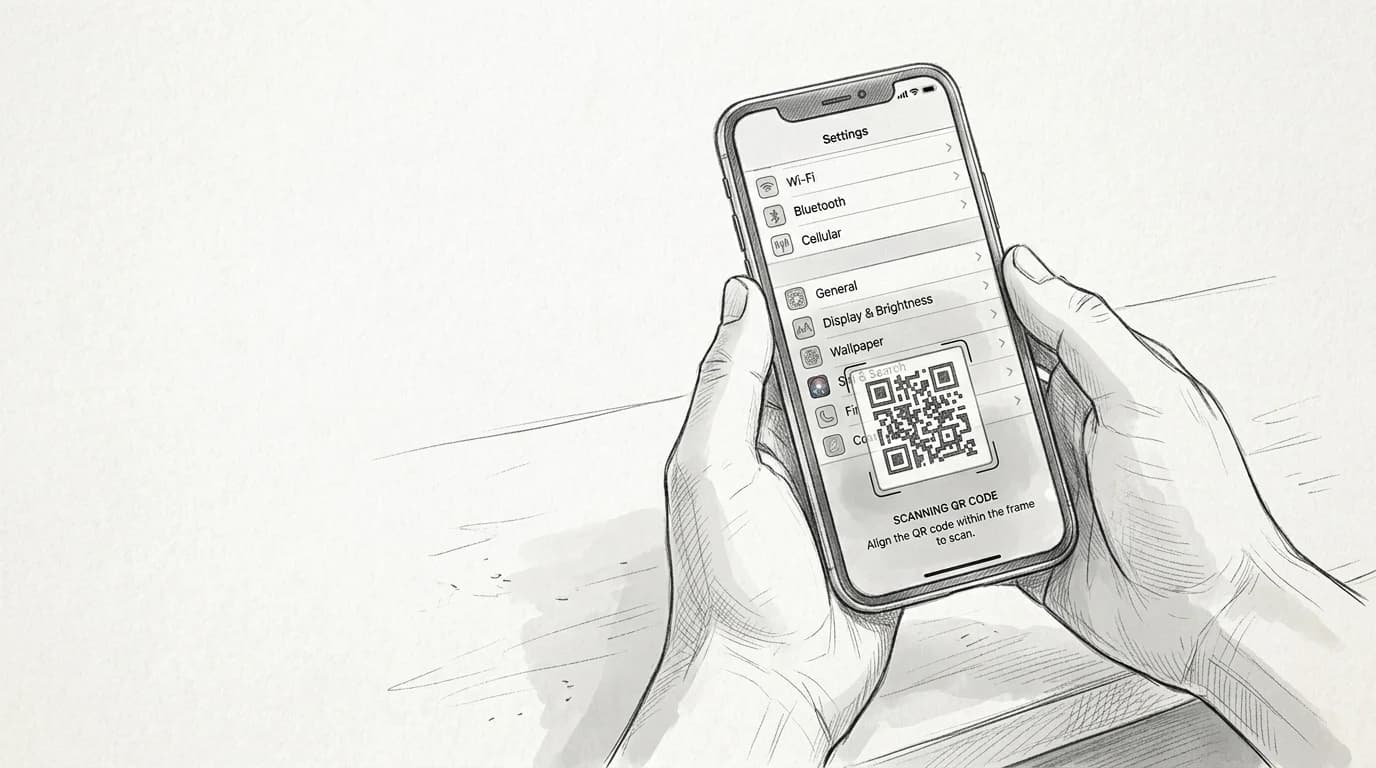
Grab your iPhone and open Settings. The full path is Settings → Mobile Service (or Cellular) → Add eSIM → Use QR Code. Point your camera at the QR code in your Roamfly confirmation email and hold steady for two seconds — the prompt appears automatically. Tap Continue, confirm the plan label, then tap Add Mobile Plan. Provisioning takes 15–30 seconds over Wi-Fi.
No QR code to hand? Tap Enter Details Manually instead. You'll need three strings from your confirmation: SM-DP+ Address (the server URL), Activation Code, and Confirmation Code. Copy-pasting beats typing — one wrong character fails the whole request. The manual activation guide has a screenshot of exactly where each string goes.
After the plan appears under Cellular Plans, set it to Off — not deleted, just disabled. Your physical SIM stays primary until you land. When iOS asks "Default Line" or "Use for iMessage," keep your home number selected. You're installing now so activation at the airport is a single toggle, not a five-minute setup in a crowded terminal.
Activate a Roamfly eSIM on iPhone
- Settings → Cellular → Add eSIM
- Tap "Use QR Code" and scan the Roamfly code
- Label the plan (e.g. "Roamfly Travel")
- Set Primary line for calls, eSIM for data
- Toggle eSIM off — leave it until you land
Practical rule: Install the eSIM at home over Wi-Fi, then leave it on Turned Off in Settings until you land. Switching the data line at the gate — not during purchase — is what stops a 7-day plan from burning Day 1 before your flight departs.
The right moment to turn your eSIM on
Validity starts the clock the moment you flip the data line on — not when you land, not when you clear customs, not when you finally find your hotel's street. A 15-day plan activated on the tarmac in New York burns an entire day before you've touched foreign soil.
The move: install the eSIM profile days before you leave. That part costs you nothing. Keep your home SIM as the active data line until your wheels touch down, then switch. Two minutes in the arrivals hall and you're connected before the passport queue moves.
Practical rule: Activate the moment you land, before clearing customs. The line is slow anyway — use it to toggle your data line, confirm the carrier name appears, and load one map tile to verify the connection.
Some travelers activate mid-flight thinking the in-air time "doesn't count." It does. Every plan on Roamfly's best prepaid travel eSIM comparison starts the validity timer on activation, full stop.
Before you close the app
- Confirm iPhone is carrier-unlocked
- QR code scanned on home Wi-Fi, not cellular
- Profile shows "Active" under Cellular plans
- Data Roaming enabled on the eSIM line
- Physical SIM set as default for calls and texts
What to do if activation fails
Three failures cause almost every botched activation. Carrier lock is the most common — your iPhone is still tied to your home carrier, and a quick call or Settings toggle fixes it before you waste time blaming the eSIM. Check under Settings > General > About; if "SIM Lock" shows anything other than "Unlocked," contact your carrier directly.
iOS version is the silent culprit most people miss. Apple's eSIM provisioning stack changed significantly in iOS 17, and anything below 16.4 will reject QR-code installs outright (Apple Support — iOS 17 release notes). Update first, then reinstall.
Network timeout hits when your Wi-Fi drops mid-download — the eSIM profile arrives half-written and stalls. Force-quit Settings, reconnect to a stable network, and use the original QR code or activation link a second time. The installation troubleshooting guide walks through each scenario with carrier-specific reset steps if the profile stays stuck.
Practical rule: Delete a failed eSIM profile before retrying — Settings > Cellular > \[failed plan\] > Remove. Stacking a second attempt on a corrupted profile compounds the error every time.
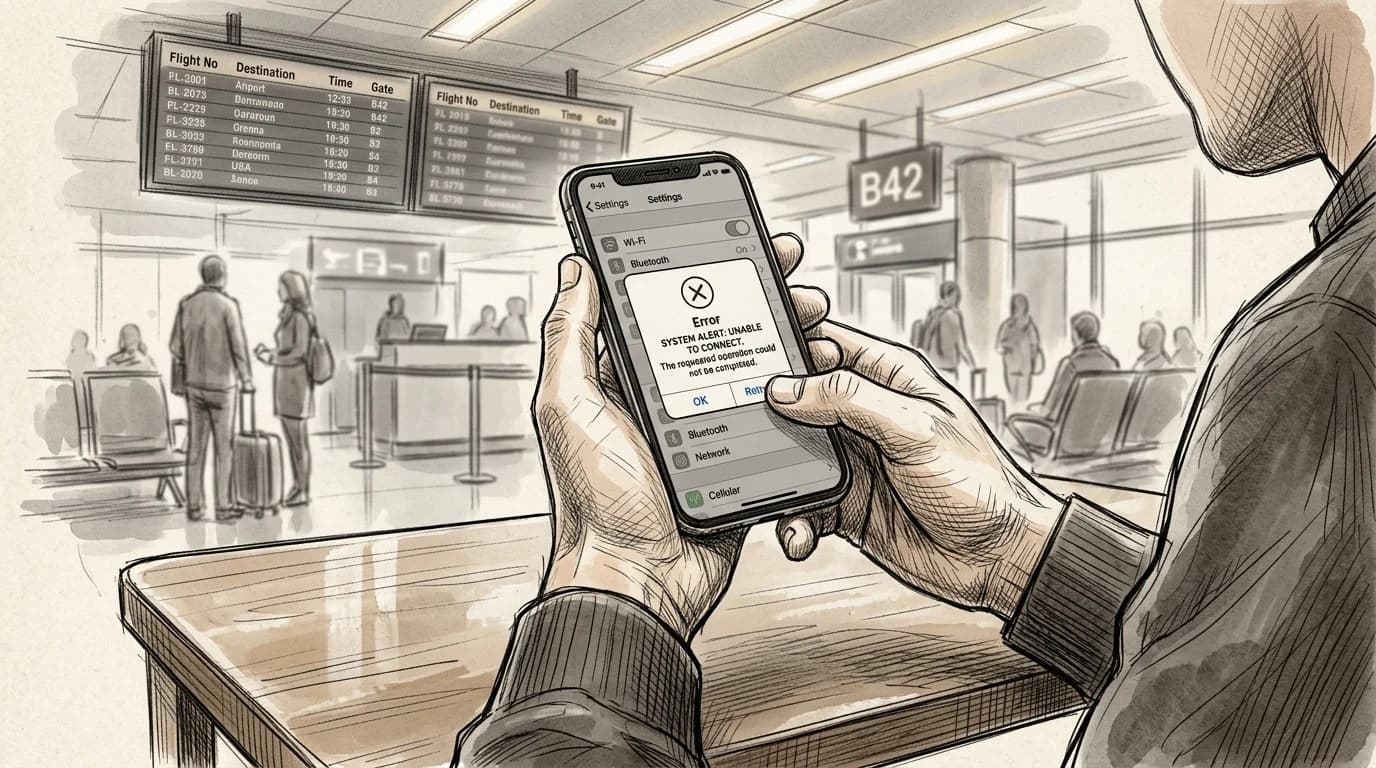
Practical rule: If activation fails at the airport, toggle Airplane Mode on for 30 seconds, then off — this forces a fresh carrier negotiation. Still failing after two attempts? The fix is almost always an iOS update or a carrier-lock you haven't cleared yet, not a bad QR code.
Get connected before you leave
Roamfly carries plans for over 190 countries — most activate in under five minutes, land in your email, and scan directly into your iPhone's eSIM settings without a physical card.
The package facts here don't match your trip's destination, so the smart move is to search by country, compare GB-per-dollar across validity windows, and buy the plan that fits your exact travel dates. A 10 GB / 30-day Europe plan runs around $12–18 depending on coverage tier; a UK-specific plan often undercuts that if you're staying put.
Not sure whether an eSIM is the right call over a physical SIM for your setup? The eSIM vs physical SIM comparison breaks down cost, convenience, and edge cases — dual-SIM logistics, older unlocked phones, destinations with patchy eSIM support — before you commit.
Buy before you board. Activation windows start on first use, not purchase date, so there's no cost to getting it ready early.
Frequently asked questions
Can I install an eSIM on iPhone without a Wi-Fi connection?
No. iPhone requires an active Wi-Fi or cellular data connection to download and install the eSIM profile. Do it at home or in any café with reliable Wi-Fi before you travel — trying at the airport gate on a congested network is a common failure point.
How many days before my trip should I install the eSIM?
Install 1–3 days out. That window gives you time to troubleshoot if the QR scan fails or the carrier takes time to provision the profile. Don't install weeks ahead — some eSIM profiles expire if not activated within 30 days of purchase.
Does activating an eSIM on iPhone start the validity countdown immediately?
It depends on the plan. Most travel eSIMs start the clock on first data use, not on installation. Check your plan's terms before scanning the QR — some fixed-date plans begin the moment the profile downloads, regardless of whether you've boarded.
Can I have two eSIMs active at the same time on iPhone?
iPhone 13 and later support two active eSIMs simultaneously with no physical SIM required. On iPhone XR through 12, only one eSIM can be active at a time alongside one physical SIM. Go to Settings → Cellular to toggle which plan handles data, calls, and SMS.
Why does my iPhone say 'eSIM not supported' after scanning the QR code?
Three common causes: your iPhone is carrier-locked to a domestic SIM (contact your carrier to unlock it), you're running iOS below 12.1 (update via Settings → General → Software Update), or the QR code was scanned more than once — most eSIM QR codes are single-use and become invalid after the first scan.