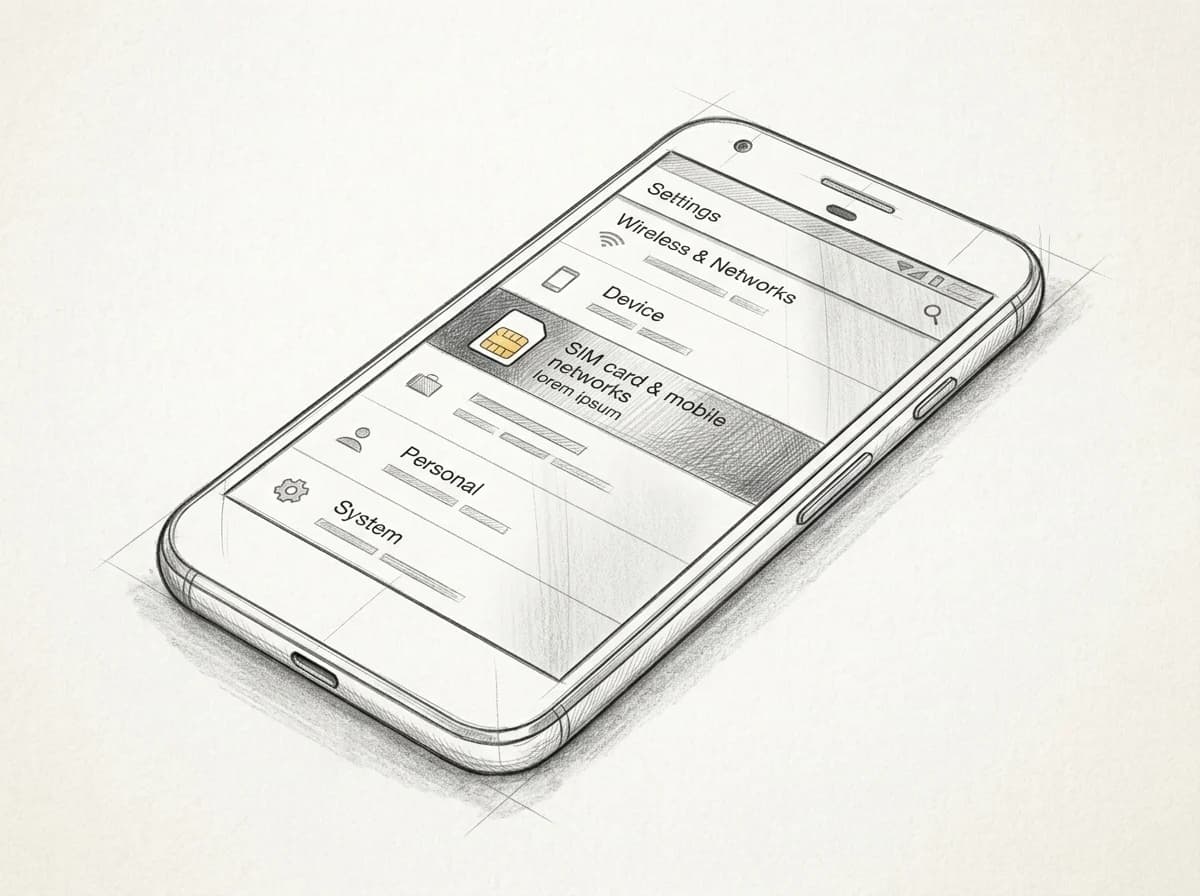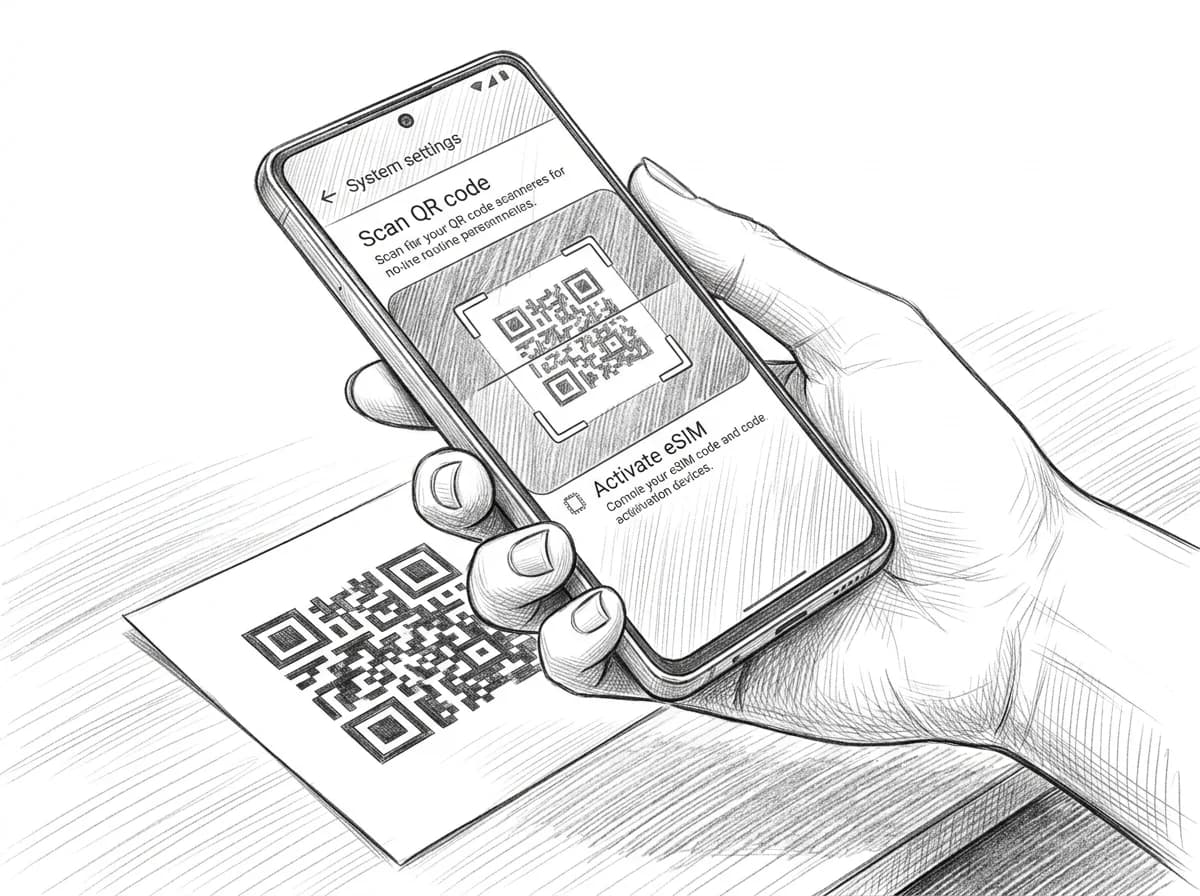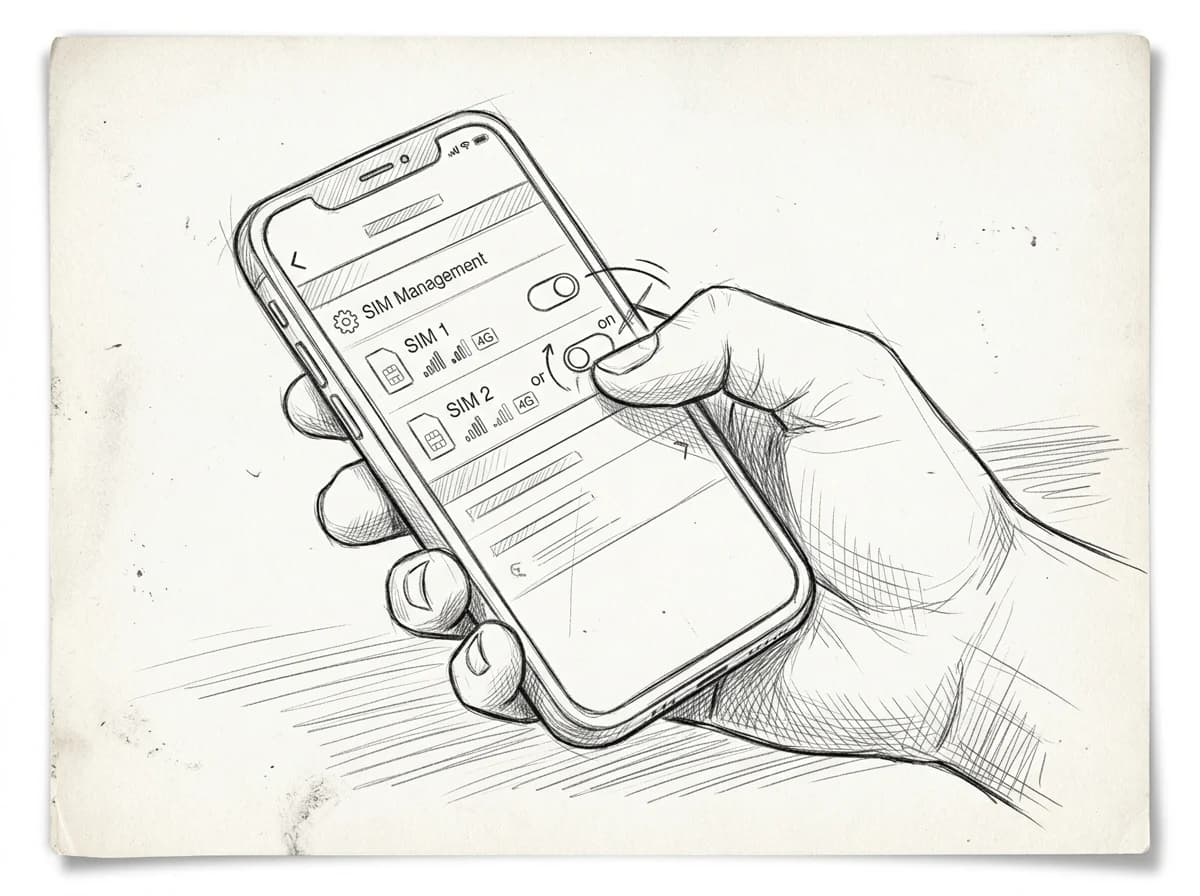
Step-by-step guide on how to install an eSIM on Android — covers QR code, manual activation, Samsung, Pixel, and OnePlus in under 10 minutes.
# How to Install an eSIM on Android in 5 Steps
Scan the QR code, tap confirm, watch the progress bar fill — and then nothing. No signal. No data. The eSIM profile is installed, but your phone is sitting there showing a full-bar icon next to a network name you've never heard of, refusing to move a single packet.
That's the failure mode most Android setup guides never mention. They walk you through the QR scan in detail, include screenshots of every confirmation dialog, and then end with "you're connected — enjoy your trip." What they skip is the 90 seconds of configuration that happens *after* the profile downloads: setting the correct SIM slot as your data SIM, confirming the APN is populated (or entering it manually when it isn't), and toggling mobile data off and back on to force the modem to register on the new network. Miss any one of those, and you're standing at the baggage carousel refreshing a map that won't load.
Android makes this harder than iOS for a structural reason. Apple controls the full stack — hardware, OS, carrier provisioning — so eSIM profiles on iPhone arrive pre-configured. Android runs across hundreds of device models from a dozen manufacturers, each with its own SIM management UI and its own rules about which slot gets priority for data. A Samsung Galaxy S24 Ultra handles dual-SIM data priority differently than a Google Pixel 8, which handles it differently than a OnePlus 12. The QR scan is the same across all of them. Everything after is device-specific.
The APN problem compounds this. Access Point Name settings tell your modem how to route data through a carrier's network. On many Android devices, these populate automatically when an eSIM profile is installed — but "many" is not "all." Budget and mid-range models frequently leave the APN field blank after installation, especially when the carrier is foreign. A blank APN produces a phone that shows full bars, displays the correct carrier name, and still cannot load a webpage. It looks like a network outage. It's a one-field fix.
This guide covers how to install an eSIM on Android correctly — not just the QR scan, but the full sequence through to a verified data connection. Each major Android family gets its own section because the menu paths genuinely differ. The APN step gets its own section because it's the one that bites the most people. And the troubleshooting section addresses the three failure states you're most likely to hit, with specific fixes rather than "contact your carrier."
If you've already scanned a QR code and you're reading this because nothing is working, jump to the APN settings section or the troubleshooting section directly. The table of contents below will get you there in one tap.

Table of contents
- Most Android guides bury the one step that breaks everything
- What an eSIM actually is on Android
- Check whether your Android phone supports eSIM
- Carrier-locked phones: the silent blocker most guides skip
- What you need before you scan the QR code
- How to install an eSIM on Android via QR code — the main method
- Installing an eSIM on Samsung Galaxy phones
- Installing an eSIM on Google Pixel phones
- Installing an eSIM on OnePlus, Motorola, and Sony phones
- Manual activation: when you don't have a QR code
- Setting your eSIM as the data SIM without dropping calls
- When to activate: on the plane, on landing, or at the hotel
- APN settings: the step most Android guides omit
- Troubleshooting: eSIM installed but not connecting
- Managing multiple eSIM profiles on one Android phone
- Transferring or deleting an eSIM profile on Android
- Get connected before you leave
- Frequently asked questions
What an eSIM actually is on Android
Your phone already contains a tiny chip that can store dozens of carrier profiles — most people have no idea it's there. That chip is the eSIM, short for embedded SIM, and on Android it works alongside or instead of the plastic nano-SIM you've been sliding in and out of phones since 2012.
A traditional SIM is a removable card programmed by one carrier. Swap carriers, swap card. The eSIM is soldered directly to the motherboard and reprogrammed over the air. No card, no tray, no ejector tool. A carrier sends your phone a profile — authentication credentials, network keys, your phone number — and the chip stores it. You switch carriers by switching profiles, not hardware.
The standard that governs all of this is maintained by the GSMA, the industry body that sets global mobile network specifications. Their eSIM architecture defines exactly how profile delivery, storage, and switching work across every compliant device (GSMA eSIM specification overview). That standardization is why a QR code from a Japanese carrier can land on your American-bought Pixel without either party doing anything custom.
On Android, the eSIM lives inside a component called the eUICC — embedded Universal Integrated Circuit Card. The eUICC can hold multiple downloaded profiles simultaneously, though only one (or, on dual-SIM builds, two) can be active at a time. This is where Android and physical SIMs start to diverge in interesting ways.
Most mid-range and flagship Android phones shipping since 2020 support at least one eSIM slot. Many support a hybrid arrangement: one physical nano-SIM in the tray plus one active eSIM profile. That combination gives you two active numbers on one device — your home number on the physical SIM, a local data plan on the eSIM — with no need to touch the tray at all while you travel.
Some devices skip the tray entirely. Google's Pixel 7 and later US models ship eSIM-only. Same with select Samsung Galaxy S25 variants in certain markets. On those phones, the eSIM isn't a secondary option — it's the only option.
The practical implication: learning how to install an eSIM on Android once means you can add a travel data plan from anywhere, without visiting a store, without a physical card, and without removing your home SIM. The profile downloads in minutes and sits dormant until you enable it. You can have it ready before you board.
One distinction worth understanding early: downloaded versus active. Your phone can store a profile — meaning it's on the eUICC chip — without that profile being your active data connection. You control activation separately, which is why the setup process has distinct steps for download and for enabling. That separation trips up a lot of first-time users who scan the QR code, see a confirmation screen, and assume they're connected. They're not. Activation is the next move.
Check whether your Android phone supports eSIM
A Samsung Galaxy S20 bought through AT&T in 2021 almost certainly has eSIM hardware — and almost certainly has eSIM disabled by AT&T's firmware. That distinction is the first thing to nail down before you spend twenty minutes scanning QR codes.
Here are the Android devices with confirmed eSIM support at the hardware level:
- Google Pixel 3 and later (Pixel 3, 3a, 4, 4a, 5, 6, 6a, 7, 7a, 8, 8a, 9 series) — Google's own hardware has supported eSIM since 2018, and Pixel phones bought unlocked almost never have it blocked
- Samsung Galaxy S20, S20+, S20 Ultra and later — the S21, S22, S23, and S24 lines all carry eSIM; the Galaxy Z Fold and Z Flip series from the third generation onward are also confirmed
- OnePlus 11 — OnePlus added eSIM support with the 11, though earlier flagships like the OnePlus 10 Pro lack it entirely depending on regional SKU
- Motorola Edge 40 Pro — confirmed eSIM; the standard Edge 40 does not support it in most markets
- Sony Xperia 10 V — Sony's eSIM rollout has been inconsistent, but the Xperia 10 V and Xperia 1 V both carry confirmed support
Android's eSIM API framework has been available to manufacturers since Android 9, but adoption has been uneven (Android Developer documentation on eSIM APIs). A device running Android 9 or later is not automatically eSIM-capable — the manufacturer has to include the physical eUICC chip and expose the API, which many mid-range and budget handsets still don't do.
The regional variant problem is where most travelers hit a wall. Samsung ships its Galaxy S series in at least two hardware configurations: the Snapdragon variant sold in the US and some Asian markets, and the Exynos variant common in Europe. Some US Snapdragon units sold through major carriers — Verizon and T-Mobile included — have eSIM locked at the firmware level until the device is fully paid off and officially unlocked. The Galaxy S21 bought directly from Samsung.com ships with eSIM active. The same model bought on a Verizon installment plan ships with it disabled.
OnePlus complicates things differently. The OnePlus 11 sold in India does not support eSIM at all — it's a hardware-level omission, not a software lock. The North American and European variants do. Check the model number: PN2220 is the Indian SKU, PHB110 and CPH2449 cover North America and Europe respectively.
Practical rule: Before installing anything, dial `*#06#` on your Android phone. If an EID number appears below your IMEI, your hardware supports eSIM. No EID means no eSIM, regardless of what the spec sheet says.
Sony's Xperia line has similar regional restrictions — the Xperia 10 V sold in Japan through major carriers like NTT Docomo sometimes ships SIM-locked, which blocks third-party eSIM profiles even though the hardware is capable.
If your device isn't on this list, check the manufacturer's spec page for "eSIM" or "embedded SIM" under connectivity. A listed spec still doesn't guarantee the feature is active on your specific variant, but absence from the spec page means the hardware isn't there at all.
Practical rule: Before buying any eSIM plan, confirm your device variant, not just the model name. A Samsung Galaxy S23 bought through T-Mobile has eSIM physically disabled until you request an unlock — the same hardware sold unlocked works immediately.
Carrier-locked phones: the silent blocker most guides skip
A T-Mobile-branded Pixel 8 will reject every eSIM profile you throw at it — not because the phone lacks eSIM hardware, but because T-Mobile's software lock tells the device to ignore any carrier credentials that aren't T-Mobile's own. This is the single most common reason a technically correct installation still fails, and most Android setup guides don't mention it until the troubleshooting section, if at all.
Carrier locking is a contractual mechanism, not a hardware one. When you buy a subsidized phone — a Galaxy S24 FE from AT&T for $0 down, a Pixel 9 bundled into a Verizon plan — the manufacturer ships a carrier-specific firmware that blocks non-partner eSIM profiles. The phone passes every compatibility check, supports eSIM in the spec sheet, and still silently refuses to activate a travel profile the moment you try to install it abroad.
The US unlock timeline is 40 days. Federal rules don't mandate a specific window, but T-Mobile, AT&T, and Verizon have each set 40 days of active service as the standard eligibility threshold before they'll process an unlock request. Prepaid devices often run longer — T-Mobile prepaid requires 365 days on the account before unlock eligibility. If your trip is in three weeks and you bought the phone last month, you may not qualify yet.
The process itself is straightforward once you're eligible. For T-Mobile, submit a request through the T-Mobile device unlock portal or the Device Unlock app (available on Samsung devices, not Pixels). For AT&T, use the AT&T Device Unlock Request page. For Verizon, call 800-922-0204 or use the online form. All three promise a response within two business days, though the actual unlock often propagates to the device within hours — you'll either see a confirmation notification or find that a new eSIM profile now installs without error.
Practical rule: Request the unlock at least five business days before departure. Carriers occasionally push the confirmation to a different email thread, the unlock can require a device restart to take effect, and if you're activating something like Roamfly's South Korea eSIM before a long-haul flight, you don't want to debug carrier permissions in a departure terminal.
International variants of the same handsets are frequently unlocked by default. A Galaxy S24 purchased in Germany or a Pixel bought directly from the Google Store (rather than through a carrier) carries no lock. Check Settings > About Phone > SIM Status — if it reads "Network: Allowed" rather than a carrier name, you're clear.
One more variable: some budget Android lines from Motorola and TCL sell carrier-exclusive models where the unlock path doesn't exist at all. The device unlock app returns a permanent "not eligible" message regardless of account age. If you're on one of those and planning a trip — whether it's Seoul or Barcelona, where the Spain plan covers 30 days of EU roaming — your practical options are borrowing an unlocked device or buying a physical SIM on arrival.
Knowing your lock status before you even look at a QR code is what separates a five-minute installation from a two-hour support conversation.
What you need before you scan the QR code
Four things have to be true before your phone can scan a QR code and turn it into a working eSIM profile. Miss one, and the process stalls — usually at the worst possible moment, like an airport gate with 12 minutes to boarding.
A stable Wi-Fi connection. Your phone downloads the eSIM profile over the internet during installation. It cannot use the eSIM network for this — the profile doesn't exist on the device yet. Airport Wi-Fi, your hotel room, your home network before you leave — any of these work. A cellular hotspot from a travel companion's phone also works, as long as it's a separate data source from the SIM slot you're installing into.
The QR code from your provider. Check your email, including spam. Most providers send it within minutes of purchase; Roamfly delivers it inside 5 minutes. Screenshot it or print it so you're not hunting through a cluttered inbox while your phone camera is waiting. If you're installing on the same device you're reading the email on, you'll need the manual activation code instead — you can't point a camera at your own screen.
Android 9 or higher. eSIM support landed in Android 9 (Pie), but the implementation only became reliable from Android 10 onward. To check: Settings > About Phone > Android version. If you're on Android 8 or below, the eSIM menu simply won't appear, regardless of whether the hardware supports it.
A carrier-unlocked phone. The previous section covered this in detail. The short version: if your carrier locked the device, eSIM installation will fail at the profile download stage, not the scan stage — which makes it harder to diagnose.
Practical rule: QR codes are single-use. Scan it on Device A, and the code is consumed. If you scan the same code on Device B, the installation will fail — the profile server has already assigned it. If you accidentally scan twice on the same device, or the process errors out mid-download, contact your provider to get the code reissued before anything else.
That last point catches more travelers than any other single issue. The instinct after a failed scan is to try again immediately. Do not do that. The code may already be marked as used on the provider's side even if your phone shows an error. Check with support first — reissuance takes a few minutes and costs nothing, but finding out your second scan voided the code at 11 p.m. in a foreign airport is avoidable friction.
One more thing worth confirming before you start: your device has at least one eSIM slot available. Some Android phones ship with eSIM capability but limit simultaneous active profiles. If you already have an eSIM installed from a previous trip, you may need to delete that profile before adding a new one. The section on managing multiple eSIM profiles covers how to audit your current slots without accidentally deleting something active.
Run through all four checkboxes — Wi-Fi, QR code, Android version, carrier unlock — and the actual installation takes under three minutes.

Practical rule: Scan the QR code at home over your own Wi-Fi, not at the airport. Airport networks drop mid-download often enough to corrupt the profile, and your QR code is single-use — a failed scan on a public network means a call to support before you board.
How to install an eSIM on Android via QR code — the main method
Your phone needs a specific sequence to accept an eSIM profile — skip one step and the QR code scanner never appears.
The path below is for stock Android 13 and 14 (Pixel UI). Samsung owners: your menu is labeled "Connections," not "Network & Internet" — a full Samsung walkthrough is in the next section, so finish reading this one first for the underlying logic, then switch.
Step 1: Open Settings and tap "Network & Internet"
Pull down your notification shade and tap the gear icon, or find Settings in your app drawer. On a Pixel 8, the option appears as the second item in the list. On older Pixels running Android 12, the label is identical — the menu hasn't moved.
Step 2: Tap "SIMs"
You'll see your physical SIM listed here, likely as SIM 1 or with your carrier name. Tap "SIMs" — not "Mobile network," which is a sub-menu for an already-active line. On Android 13+, this screen shows all installed profiles, physical and eSIM alike.
Step 3: Tap "Add eSIM" or the "+" icon
The button sits at the bottom of the SIMs screen. On Pixel devices it reads "Add eSIM" in blue text. On some Android 14 builds it appears as a "+" in the top-right corner instead. Both take you to the same place.
Step 4: Choose "Scan QR code"
Android will offer two options: scan a QR code or enter a code manually. Tap "Scan QR code." Your camera opens immediately — no separate permission prompt required on Android 13+.
Step 5: Point your camera at the QR code from Roamfly
Hold your phone 15–25 cm from the code. The frame locks in under two seconds when the image is sharp. Android downloads the profile directly from the carrier's SM-DP+ server — you don't tap "confirm" until the download completes, which takes 5–30 seconds depending on your current connection. A progress ring appears at the top of the screen during the download.
Step 6: Name the plan and confirm
Android asks you to give the plan a nickname ("Japan Trip," "EU August," whatever you want) and then confirm activation. Tap "Activate" only if you want to use it immediately. If you're installing the eSIM before your departure and don't want it burning through data on your home network, tap "Not now" — the profile sits installed but dormant until you switch it on manually.
Step 7: Verify the plan appears under SIMs
Navigate back to Settings → Network & Internet → SIMs. Your new eSIM line should appear alongside your physical SIM. If it shows "Not activated" and you chose "Not now" in the previous step, that's correct behavior. If it shows an error code, the troubleshooting section covers the five most common failure states.
One nuance worth knowing: Android will prompt you to choose which SIM handles calls, texts, and data separately — default behavior doesn't automatically route all three through your new eSIM. The section on setting your eSIM as the data SIM walks through that configuration in detail.
The entire process from Settings to confirmed profile takes under three minutes on a fast connection. Slower hotel Wi-Fi can stretch the profile download to 90 seconds, but it completes reliably as long as the connection doesn't drop mid-transfer.

Installing an eSIM on Samsung Galaxy phones
Samsung buries the eSIM menu one layer deeper than most Android guides assume. On a Galaxy S24 or S23, you're not looking for a generic "SIM" entry — you need Settings → Connections → SIM manager → Add eSIM, and that exact path only appears once the device detects no physical SIM occupying the primary slot, or after you've already popped the tray.
One UI 6 (shipping on the S24 series and Z Fold 6) reorganized the Connections submenu. "SIM manager" now sits near the top of the Connections page with its own dedicated icon. On One UI 5 (S23, Z Fold 5, Z Flip 5), the same item appears as "SIM card manager" — the extra word trips up searches, and Samsung's own support documentation uses both labels inconsistently.
Here's the step-by-step for One UI 5 and 6:
- Open Settings.
- Tap Connections.
- Tap SIM manager (One UI 6) or SIM card manager (One UI 5).
- Tap Add eSIM (One UI 6) or Add mobile plan (One UI 5).
- Tap Scan QR code and hold the camera over the code your provider sent.
- Confirm the download, then name the profile — something short like "UAE" or "Trip EU" works better than the default carrier string.
- On the SIM manager home screen, set the new eSIM as the default for Mobile data.
Samsung's Galaxy S23 and S24 are dual-SIM by design globally, so you can keep your home SIM in the physical tray and run the travel eSIM alongside it. The Z Fold 5 supports the same dual-stack setup — useful on a longer trip where you don't want to lose your home number entirely. One caveat: Samsung devices sold through certain US carriers (some AT&T and T-Mobile variants) may restrict the second SIM slot or eSIM downloads to their own ecosystem. Check the model number against Samsung's carrier restrictions list before you travel.
The QR code scan itself rarely fails on Samsung hardware. What does fail, more often, is the phone defaulting data back to the physical SIM after the eSIM installs. Go back into SIM manager after activation, tap the eSIM profile, and confirm "Use SIM" is toggled on for data — One UI 5 in particular doesn't prompt you to switch automatically.
If you're heading to the UAE, Roamfly's 7-day UAE eSIM works on the S23, S24, and Z Fold 5. Install it before departure, leave it dormant, and it activates the moment your phone registers on a local UAE tower.
One UI 6 added a "Travel eSIM" shortcut under the Quick Settings panel on some Galaxy builds — swipe down twice, look for the SIM icon. It routes you to the same SIM manager screen but skips two taps. Not every region gets this toggle, so don't count on it. The Settings path always works.
Installing an eSIM on Google Pixel phones
Pixel phones handle eSIM installation cleanly — but two edge cases catch travelers every time, and neither appears in Google's own documentation.
The Fi lock problem
If you bought your Pixel through Google Fi (or certain US carrier promotions), the eSIM chip ships locked to that carrier. A Pixel 7 Pro purchased on Fi looks fully functional but will reject any third-party eSIM profile at the scan stage, throwing a vague "couldn't finish setting up your eSIM" error. Check your purchase receipt or the original box: if it says "Google Fi" or lists a carrier subsidy, contact that carrier before your trip and request an unlock. Processing takes 24–72 hours. Don't leave this to the airport.
Pixels bought directly from the Google Store ship unlocked out of the box, globally. That includes every Pixel 3a and later.
The step-by-step path on Pixel 6, 7, and 9 series (Android 13 and 15)
Open Settings, then tap Network & internet. You'll see a "SIMs" option at the top of that screen — tap it. At the bottom of the SIM list, tap "Add SIM." Your camera opens automatically. Hold the QR code from your Roamfly confirmation email steady in the frame; the phone reads it in under three seconds on most connections. Confirm on the next screen, name the profile if you want (something like "Japan Trip" beats "Mobile plan 2"), and tap Activate.
The profile downloads in the background. You don't need a Wi-Fi connection to scan the code, but you do need one to complete the download — so scan while you still have home Wi-Fi or before boarding. The download itself is usually under 1 MB, but a stalled connection mid-download leaves the profile in a broken state that requires deletion and re-install.
Pixel 8 on Android 14 — the one UI difference
Google moved the eSIM path slightly in Android 14. On Pixel 8 and Pixel 8 Pro, the route is Settings > Network & internet > SIMs > Add eSIM. The word "Add SIM" became "Add eSIM" — minor, but if you're following a generic Android guide that says "Add SIM" and you don't see it, that's why. Everything after that point is identical to earlier Pixel models.
After the profile downloads
The phone installs the profile but doesn't always activate it automatically. Go back to Settings > Network & internet > SIMs, find the new profile, and toggle it on. Then tap it and confirm "Use for mobile data." If you're keeping your physical SIM in for calls and texts, Pixel handles dual-SIM management gracefully — you set the data SIM independently from the call SIM in that same screen.
On Pixel 9 Pro, Android 15 adds a "Travel mode" shortcut in the Quick Settings drawer that surfaces your secondary SIM without digging through menus. Swipe down twice from the top of the screen and look for the SIM toggle tile. Worth adding to your Quick Settings panel before departure — it saves real time at the airport when you're switching between profiles.
One last thing: Pixel phones on Android 14 and later store up to 10 eSIM profiles locally. You won't run out of space for a multi-country trip.
Installing an eSIM on OnePlus, Motorola, and Sony phones
Three mid-range flagships, three slightly different paths to the same destination.
OnePlus 11 and 12 both support eSIM, but OxygenOS routes you differently than stock Android. Instead of a clean "SIM cards" menu, you'll find the eSIM option buried inside Settings → Dual SIM & Cellular → Add eSIM. Some OxygenOS 13 builds label this tab "SIM Management" rather than "Dual SIM & Cellular" — if the first label isn't there, check the second before assuming your phone lacks eSIM support. Once you're inside the right menu, the flow is standard: tap Add eSIM, scan your QR code, and follow the confirmation prompts. The OnePlus 12 handles the download in under 90 seconds on a decent Wi-Fi connection.
One complication specific to OnePlus: the toggle that sets your data SIM defaults to physical SIM after every reboot on some OxygenOS builds. Check Dual SIM & Cellular → Mobile data after your first restart and confirm it's pointing to your eSIM profile, not the SIM tray. It's a minor firmware quirk, but it's caused enough confused travelers at Charles de Gaulle that it's worth knowing before you board.
Motorola Edge 40 Pro runs a near-stock Android experience, which makes it the most straightforward of the three. Go to Settings → Network & internet → SIMs → Add SIM. The QR scanner opens directly. Motorola doesn't layer a proprietary SIM manager on top, so every step matches the generic Android walkthrough. If you're on a Motorola and the process feels different from what's described here, the most likely cause is a carrier-locked handset — not a Motorola-specific quirk.
Sony Xperia 1 V and Xperia 5 V both carry eSIM hardware, though Sony's global unlocked variants are the ones you want. The path on Xperia is Settings → Network & internet → SIM cards → Download a SIM instead. Sony's UI uses the phrase "Download a SIM" rather than "Add eSIM" — functionally identical, just different labeling. The Xperia 1 V supports dual SIM (one physical, one eSIM), so you can keep your home SIM active for calls and route all data through a travel eSIM. That's a useful setup for a two-week trip where you still need your home number reachable.
A few things apply across all three brands. First, eSIM download requires an active internet connection — use hotel Wi-Fi or the airport's public network before you drop your physical SIM. Second, if your QR code throws an error on the first scan, screenshot it and use the Enter manually option instead; the code itself is valid, the camera just occasionally misfires in low light. Third, all three phones will ask you to name the new eSIM profile during setup. Use something specific: "Japan Roamfly" beats "eSIM 1" when you're juggling profiles across a three-country itinerary.
Knowing how to install an eSIM on Android across different OEM skins comes down to one thing: find where the manufacturer hid the SIM manager, and the rest of the steps are identical to any other Android device.
Manual activation: when you don't have a QR code
Somewhere between 3 and 5 percent of eSIM activations skip the QR code entirely — not because something went wrong, but because the provider never issues one. Corporate travel accounts, certain regional carriers in Southeast Asia and the Middle East, and a handful of older wholesale platforms deliver a SM-DP+ address and an activation code as plain text instead. If Roamfly or any other provider emails you two strings that look like a URL and an alphanumeric code, this is the path you take.
The underlying process is the same as QR scanning — your phone contacts the carrier's remote SIM provisioning server, authenticates the activation code, and downloads the profile. You're just typing the server address by hand instead of letting the camera parse it from a printed matrix.
On stock Android (Pixel, Motorola, OnePlus, Sony running AOSP-adjacent builds):
Open Settings, tap Network & internet, then SIMs. You should see a button labeled "Add eSIM" or a small plus icon in the top corner. When the camera screen launches for QR scanning, look for a secondary option — usually a text link reading "Enter activation code manually" or "Can't scan? Enter manually." Tap it. You'll see two fields: the SM-DP+ address (the server URL, which starts with something like `smdp.provider.com`) and the activation code (typically a 35-character alphanumeric string, sometimes called a "matching ID"). Paste or type both carefully. A single character error will return a generic provisioning failure with no useful error message, so copy-paste from the email if at all possible. Tap Connect, and the download begins — usually 15 to 45 seconds on a stable Wi-Fi connection.
On Samsung Galaxy (One UI 5 and later):
The path diverges slightly. Go to Settings, then Connections, then SIM card manager, then Add mobile plan. Samsung's QR scanner has a dedicated "Enter activation code" button below the viewfinder — it's labeled differently on older One UI builds (look for "Add using activation code" if the main button isn't visible). The two-field input for SM-DP+ address and activation code behaves identically to stock Android from that point forward.
One UI 6.1 on the Galaxy S24 series adds a third optional field labeled "confirmation code" — leave it blank unless your provider explicitly gave you one. Most don't.
When this method shows up:
Corporate-managed eSIMs provisioned through an MDM platform almost always use SM-DP+ delivery because the IT team controls which device gets which profile. Some regional providers in markets like Indonesia, the UAE, and South Korea use older RSP platforms that don't generate scannable QR images. And occasionally a QR code arrives corrupted in an email client that mangles the image — in that case, ask the provider to resend the raw activation code strings, and use this path instead.
The GSMA's SM-DP+ specification defines this two-string format as the fallback delivery channel precisely because QR images degrade in transit (GSMA eSIM specification overview). It's not a workaround. It's the spec.
One practical difference: manual activation is slightly slower to type and slightly faster to troubleshoot, because the fields are discrete and you can verify each string independently before submitting. If the download fails, check the SM-DP+ address first — providers occasionally include a trailing slash or space when copying from their backend, and Android's parser won't clean that up for you.
Setting your eSIM as the data SIM without dropping calls
The "Preferred SIM for data" toggle defaults to your home SIM. Android makes this choice silently during installation, and most travelers don't notice until they hit their first café in Madrid and the data is burning through a domestic plan at $15 per megabyte.
The fix is two taps deep — but you have to know where to look.
Stock Android (Pixel and most non-Samsung devices)
Open Settings, then Network & Internet, then SIM cards. You'll see both SIMs listed. Tap "Preferred SIM for data" and switch it to your newly installed travel eSIM. While you're on that screen, leave "Calls" and "SMS/Messages" pinned to your physical SIM. That split-SIM configuration is the whole point: the travel eSIM handles data, your home number stays reachable for calls and texts without triggering international rates.
One thing Android doesn't warn you about: if you have "Automatically select data SIM" enabled, the OS can flip back to the home SIM after a reboot or a network handoff. Turn that toggle off.
Samsung Galaxy (One UI 5.x and 6.x)
Samsung's path differs. Go to Settings, then Connections, then SIM Manager. Samsung labels the section "Preferred SIM" and shows a three-row breakdown — calls, texts, and mobile data as separate lines. Set mobile data to your travel eSIM, calls and texts to your physical SIM. Samsung also has a "Data during calls" option that asks which SIM carries data when you're mid-call; set it to the travel eSIM so voice calls on the home line don't interrupt the data connection.
Why Android defaults to the wrong SIM
When you add a second SIM — physical or eSIM — Android 12 and later applies a heuristic: whichever SIM has an active data plan registered in the carrier database gets priority for data. Your home SIM almost always wins that check because it has a known profile. The travel eSIM, especially a freshly provisioned one, hasn't transmitted any usage signal yet. Android reads that as "unverified for data" and sidelines it.
Practical rule: After installing the travel eSIM, go to SIM settings before you toggle airplane mode off. Set data to the travel eSIM while you're still on Wi-Fi, so there's no window where the home SIM can connect to a foreign network and rack up roaming charges.
If your destination is Spain, Roamfly's Spain 7-day plan activates immediately after you complete this configuration step — no APN hunting, no reboot required on most Pixel and Samsung devices. The section on APN settings below covers the cases where it does require manual input.
One last thing: some dual-SIM Android phones let you rename each SIM profile. Rename the travel eSIM something obvious — "Spain data" or "Roamfly EU" — before you leave. At 11 PM in a foreign airport, squinting at two identical SIM icons, you'll thank yourself for the five seconds it took.
Practical rule: After install, manually set your travel eSIM as the data SIM before you land. Android defaults new eSIM profiles to calls, not data — you will have a working phone number on the wrong SIM and zero mobile data until you toggle it yourself in Preferred SIM settings.
When to activate: on the plane, on landing, or at the hotel
Nội Bài airport in Hanoi sits 45 minutes from the city center by cab — and if your flight lands at 11 p.m., your hotel check-in is hours away, the local SIM kiosks are closed, and you need a working map before you even reach the taxi rank. That gap between wheels-down and a usable bed is exactly where activation timing matters.
The QR code scan and the data activation are two different events. Scanning the QR code — the step that loads the eSIM profile onto your phone — can happen anywhere you have Wi-Fi: on your home couch, in the departure lounge, even at 36,000 feet if the aircraft has in-flight internet. Your Android downloads the carrier profile and stores it. No local signal required. What you can't do mid-flight is activate the data SIM against a live network, because you need the destination carrier's tower to hand your phone a working IP address.
The practical split: scan before you board, activate the moment the plane's wheels touch tarmac.
Powering airplane mode off at 50 feet above the runway isn't the goal. The goal is that by the time you're walking through the jet bridge, your eSIM has already registered to a local network. On Android, the registration handshake usually takes 30 to 90 seconds once you're in range of a tower with signal.
Dubai is the clearest stress test. Emirates flights from London often land between 6 a.m. and 7 a.m., but hotel check-in doesn't begin until 3 p.m. at the earliest — a nine-hour window where you're navigating the Metro, finding breakfast near the Creek, and generally moving through a city of 3.5 million people without a working data connection unless you activated on arrival. Installing the eSIM profile in the Heathrow lounge and activating at Dubai International Terminal 3 takes under two minutes total.
Vietnam compounds this because the time difference from Europe or North America runs between 6 and 14 hours, meaning passengers arrive disoriented, sometimes in the middle of the night, and face a city where English-language signage outside the airport terminal drops off sharply. Roamfly's Vietnam eSIM covers 15-day trips across Hanoi, Ho Chi Minh City, and the central coast — and the right moment to activate it is before you reach passport control, not after you've spent 25 minutes trying to find a working ATM with no Maps access.
Practical rule: Activate the moment you land, before clearing customs. The immigration queue alone is long enough for your phone to complete network registration — you'll walk out with data already live.
One caveat: if your destination plan charges by the day from first activation rather than a fixed calendar window, activating before you actually need data costs you part of a paid day. Read the validity model before you scan. Most Roamfly packages use a fixed-day window starting at purchase, not at first use — so there's no penalty for activating early. Check the setup guide if you're unsure which model your plan uses.
The hotel approach — waiting until you've checked in and connected to the property's Wi-Fi — is logical but optimistic. It assumes the hotel Wi-Fi works on arrival, that you can navigate to the property without data, and that nothing goes wrong between the terminal and the front desk. Those are three assumptions too many for a trip that matters.
APN settings: the step most Android guides omit
Your eSIM is installed, the profile shows "Active" in the SIM manager, and your phone still can't load a webpage. On iOS that scenario is rare — Apple's eSIM framework pulls APN configuration automatically from the carrier bundle. Android doesn't guarantee that. Depending on the device manufacturer, the Android version (12, 13, or 14 all handle this slightly differently), and the eSIM provider's profile structure, the Access Point Name can arrive blank, incomplete, or populated with a string from your home carrier that does nothing abroad.
The Android Developer documentation confirms that APN provisioning through eSIM profiles is implementation-dependent — carriers can push APN settings via the profile, but aren't required to, and Android itself won't reject a profile that omits them (Android Developer documentation on eSIM APIs). That gap is why "eSIM installed but no data" is the most common support ticket for Android travelers.
Finding the APN settings field
The path varies by manufacturer and Android version, but the underlying menu exists on every device.
On stock Android 12–14 (Pixel): Settings → Network & internet → SIMs → tap your eSIM profile → Access Point Names → tap the "+" or "Add" icon.
On Samsung One UI 5–6 (Android 13–14): Settings → Connections → Mobile networks → Access Point Names. Make sure you've selected the eSIM as the active SIM before you open this menu or you'll edit the wrong profile's APN.
On OnePlus OxygenOS and Motorola's near-stock builds, the path mirrors Pixel's. Sony Xperia adds one extra tap: Settings → Network & internet → Mobile network → Advanced → Access Point Names.
If the field is greyed out or locked, the eSIM profile has a carrier lock on APN editing — contact the eSIM provider's support, because you can't override that in software.
What to type
APN strings are provider-specific. Three common configurations for travel eSIM profiles:
- Roamfly / most GSMA-standard travel eSIMs: APN `globaldata`, MCC and MNC left blank, Authentication type "None", APN type `default,supl`
- Airalo's general profiles: APN `airalo`, everything else default
- Holafly: APN `holafly`, no username or password required
If your provider isn't listed, check the confirmation email — reputable travel eSIM providers include the APN string alongside the QR code. If the email is silent on APN and data still isn't working after activation, that's the line to ask support about. Don't guess; an incorrect APN type field ("MMS" instead of "default") will silently fail without any error message.
After you save
Tap "Save", then toggle airplane mode on and off. The phone renegotiates the data session using the new APN. Give it 20 seconds. Open a browser to a plain HTTP URL — not a search engine, which may load from cache — and confirm you have a live connection before you need it in the field.
One detail most guides skip entirely: if you have a physical SIM in slot 1 and the eSIM in slot 2, Android may default data back to the physical SIM after the airplane mode toggle. Go back to Settings → Network & internet → SIMs and confirm the eSIM is set as the preferred data SIM. That single checkbox is responsible for more "it still doesn't work" moments than any APN misconfiguration.

Practical rule: If your eSIM shows 'Active' but you have no data in Vietnam or UAE, go straight to APN settings before rebooting or reinstalling. A missing APN entry — not a failed profile — causes 80% of post-install data failures on Android 12 and 13 devices.
Troubleshooting: eSIM installed but not connecting
Your eSIM profile shows "active" in the settings menu — and still nothing loads. That gap between installed and working is where most support tickets live, so run through this sequence before assuming the profile itself is broken.
Check your data SIM assignment first. Android does not automatically route data through a newly installed eSIM. On most devices, open Settings > Network & internet > SIMs, find the new profile, and confirm "Mobile data" is toggled to that SIM specifically. On Samsung, the path is Settings > Connections > SIM card manager > Preferred SIM for mobile data. Skipping this step is the single most common cause of a "connected but no internet" situation — the eSIM is live, but your phone is still sending data over your old physical SIM.
APN blank or wrong. Some Roamfly profiles push APN settings automatically on download. Others don't, depending on the device's Android version and the carrier's provisioning method. If your APN field is empty, navigate to Settings > Network & internet > SIMs > [your eSIM] > Access Point Names. Tap the plus icon and enter the APN details from your Roamfly confirmation email. The name and APN string are different fields — fill both. Authentication type should stay "None" unless the confirmation email specifies otherwise. Save, then toggle airplane mode on and off to force a re-registration.
Roaming toggle. If you're already in the destination country, the roaming switch matters. Go to Settings > Network & internet > SIMs > [your eSIM] and confirm "Roaming" is on. On Pixel devices running Android 14, this toggle sometimes resets after a reboot — it's a known behavior on the Pixel 7 series specifically. If you've restarted the phone since activation, check the roaming switch again before anything else.
Profile download failed mid-process. A dropped connection during QR scan leaves a partial profile that shows as installed but can't authenticate. Delete the profile entirely: Settings > Network & internet > SIMs > [your eSIM] > Remove. Then re-download using the original QR code or, if the code was single-use, contact Roamfly support for a fresh one. Most providers can reissue within minutes.
Samsung "SIM not provisioned" error. This message appears when the profile downloaded but the network hasn't confirmed the IMSI. Force a network search: Settings > Connections > Mobile networks > Network operators > Search manually. Select your carrier from the list. If the error persists, reboot with only the eSIM enabled — remove or disable the physical SIM temporarily so there's no ambiguity about which profile the radio is trying to register.
Phone still carrier-locked. If none of the above resolves it, you may be hitting a lock your carrier hasn't removed. Call your home carrier with this script: "I need to confirm my device is fully unlocked for international eSIM use. Can you check the IMEI against your lock database?" Ask them to confirm in writing if possible. A locked device will install the profile without error but silently reject registration on any foreign network — the OS doesn't surface a clear "locked" message.
Rebooting between each step is not optional housekeeping. The Android radio stack doesn't always re-read profile parameters without a full restart, and a reboot that takes 40 seconds can save you 40 minutes of dead ends.
Managing multiple eSIM profiles on one Android phone
A Samsung Galaxy S24 Ultra holds up to 12 eSIM profiles simultaneously. A Google Pixel 9 caps at 10. A OnePlus 12 running OxygenOS 14 stores as few as 5 (GSMArena device specifications database) — so if you're stacking South Korea, UAE, and US plans before a six-week trip, that ceiling becomes a real operational problem.
The storage limit is baked into the eUICC chip, not the operating system. Android can't override it. When you hit the cap, the phone refuses to download the next QR code regardless of how good your connection is. The fix is either to delete an old profile or accept that profile management is part of your pre-trip prep, the same way packing cubes are.
Switching between saved profiles doesn't require a re-download. Once a profile is installed, it lives on the chip. On most Android devices, navigate to Settings > Connections (or Network & Internet) > SIM Manager > eSIMs. Every installed profile appears there with a toggle. Tap the one you want active, confirm the switch, and your phone registers on the new carrier within 30–60 seconds. You don't need the original QR code. You don't need to contact the provider. The profile is yours until you delete it.
Samsung's One UI labels inactive profiles as "Disabled" and shows them in a greyed-out list below your active line. Pixel's interface calls them "Saved" in Settings > Network & Internet > SIMs. The naming differs; the mechanic is identical — tap to enable, tap to disable.
One behavior worth knowing: some carriers embed a "delete-on-disable" flag in the profile. Sprint/T-Mobile US profiles historically carried this flag. When you disable the eSIM, the device auto-wipes it. If you plan to return to the US on a second leg and want to keep the profile alive, check whether it's still visible in your SIM manager before you leave American airspace. If it vanished, you'll need to re-download.
Roamfly's South Korea 15-day plan doesn't carry that flag, so you can disable it during a UAE layover, activate a Gulf plan, and re-enable the Korea profile when you land in Seoul — no re-download required.
Deleting a profile is straightforward but irreversible on most chips. In your SIM manager, select the profile, choose "Delete" or "Remove eSIM," and confirm. The slot opens immediately. On Samsung, the path is Settings > Connections > SIM Manager > tap the profile > Remove. On Pixel: Settings > Network & Internet > SIMs > tap the profile > Delete eSIM. The plan itself — the data balance, the validity window — may still be active on the carrier side. Deleting the local profile doesn't cancel it. If you have days remaining and want to reinstall, contact the eSIM provider for a new QR code; most issue one reactivation link, sometimes two.
Frequent travelers who visit the same destinations repeatedly should audit their SIM manager before every departure. Twelve slots sound like plenty until you realize four are occupied by expired plans from 2023 that you forgot to remove.
Transferring or deleting an eSIM profile on Android
Deleting an eSIM profile on Android takes four taps and about ten seconds — recovering from an accidental deletion can take considerably longer, or cost you another purchase entirely.
The path is consistent across most Android builds: Settings → Connections (or Network & internet) → SIM manager → [profile name] → Delete eSIM. On Samsung One UI 6, the final confirmation reads "Remove eSIM." On stock Android 14, it says "Delete." Different label, identical outcome: the profile is erased from your device's eUICC chip, and the activation code that came with your plan is invalidated. You cannot re-scan the original QR code.
This is where Android diverges sharply from iOS. Apple's ecosystem allows select carriers to store a profile copy server-side, letting you re-download to the same Apple ID on the same device. Android has no equivalent standard. Once a profile is deleted, the eSIM carrier — whether that's a local Uruguayan operator or a regional African network — treats the activation as consumed. You need a new plan.
That distinction matters most on short-validity plans. A 7-day plan for a quick trip to Montevideo or a week on the Tanzanian coast is typically a one-shot activation: the carrier sells it, you install it, the clock starts. If you accidentally delete it on day three while cleaning up your SIM manager, the remaining four days are gone. Roamfly's Tanzania 7-day eSIM is a concrete example — that plan covers data through a regional host MNO for exactly one activation window. There's no redemption path after deletion.
Uruguay follows the same pattern. Travelers doing a four-day stop between Buenos Aires and São Paulo often pick a short-validity plan sized for the trip. Those plans are written off the moment the profile leaves the chip.
A transfer to a new Android device is a separate scenario and equally unforgiving. Unlike a physical SIM you can slide out and move, an eSIM profile is device-bound at the point of installation. Moving to a replacement phone — say, your screen cracked in Dar es Salaam — means the profile on the broken handset is inaccessible. Roamfly's support team can sometimes issue a re-activation code on request, but that process requires confirming the original order, and it's not guaranteed for all partner networks. Contacting support before deleting or wiping a device is always faster than contacting them after.
One scenario where deletion is deliberate and sensible: you've returned home, the plan has expired, and you want to keep your SIM manager uncluttered before the next trip. Expired profiles don't consume active resources, but Android caps the number of installed eSIM profiles — typically 10 to 15 depending on the chipset — so periodic housekeeping matters on frequent travelers' devices.
The rule of thumb is simple. Before you delete any profile, check two things: is there data remaining on the plan, and are you certain you won't need it again? If both answers are clearly no, delete freely. If there's any doubt, leave the profile installed. An inactive eSIM sitting in your SIM manager costs nothing.
Get connected before you leave
Four destinations, one process, under five minutes from checkout to active profile on your phone.
If this guide walked you through the QR code flow, the APN settings, and the Samsung-versus-Pixel quirks, the only thing left is picking a plan that fits your trip. Roamfly carries options across the destinations most Android travelers ask about — and each one delivers the QR code by email the moment you pay, so you can scan it before you board.
Heading to Dubai or Abu Dhabi? Roamfly's UAE eSIM includes a 15-day plan built for the length of a typical Gulf itinerary — long enough to cover a conference plus a long weekend in the desert without scrambling for a top-up. South Korea's subway system runs on some of the fastest urban 5G in the world; the Korea plan handles Seoul, Busan, and the KTX corridors between them without a coverage gap. Vietnam's geography is the hard case — 1,650 kilometres of coastline, river deltas, and mountain passes — and the Vietnam plan holds signal from Hanoi's Old Quarter down to the Mekong. Spain's plan covers the peninsula, the Balearics, and the Canaries on a single profile, which matters if your itinerary swings between Madrid and Palma.
The five-minute delivery claim is literal. Pay, check your email, open the QR code on a second screen or print it, go to Settings > Connections > SIM Manager on your Android, and scan. The profile installs in under two minutes on most devices. The remaining three are buffer for whatever your carrier's provisioning server decides to do that day.
One note on timing: don't activate the data plan until you actually need it. Most Roamfly plans start their validity window the moment you toggle the eSIM on as your active data SIM, not when you install the profile. Install at home, activate at the airport, and every day of validity counts toward actual travel time rather than sitting in your living room.
The full setup walkthrough — including the APN step that most Android guides skip and the Samsung-specific SIM manager path — lives earlier in this guide. If you hit a snag after purchase, the eSIM troubleshooting guide covers the most common Android error states: profile download failures, "not connected" after activation, and APN fields that need manual entries.
Ready to get connected? Roamfly's UAE eSIM ships in under 5 minutes.
Frequently asked questions
Which Android version do I need to use an eSIM?
Android 9 (Pie) introduced native eSIM management APIs, so your phone needs at least that version. In practice, most eSIM-capable Android handsets — Pixel 3a onward, Samsung Galaxy S20 and later, OnePlus 11 and later — shipped with Android 9 or higher already installed. Go to Settings → About Phone → Android Version to confirm yours.
Does a factory reset delete my installed eSIM profile?
On most Android phones, yes. A factory reset wipes the eSIM management partition along with everything else, which means your installed profile is gone permanently. Before resetting, export or note your activation code if your provider allows reuse — Roamfly profiles can be reinstalled from your account dashboard without buying a new plan.
Can I use an eSIM and a physical SIM at the same time on Android?
Yes, on any dual-SIM Android device — which covers the vast majority of eSIM-capable handsets released since 2020. Set your physical SIM as the default for calls and SMS, and the eSIM as the mobile data SIM. On Samsung, this is under Settings → Connections → SIM Manager. On Pixel, it's Settings → Network & Internet → SIM cards.
Why does my eSIM show 'installed' but I have no mobile data?
The most common cause is a missing or incorrect APN setting. Carriers don't always push APN configs automatically on Android the way they do on iOS. Go to Settings → Connections → Mobile Networks → Access Point Names, add the APN your provider specifies, and save. The second culprit is data roaming being switched off — toggle it on under the same Mobile Networks menu.
How do I check how much data I have left on my Roamfly eSIM?
Open the Roamfly app, tap your active plan, and your remaining data balance refreshes in real time. Android's built-in data counter (Settings → Network & Internet → Data Usage) tracks consumption by SIM slot but doesn't pull the carrier-side balance, so the app reading is the authoritative number.
How many eSIM profiles can one Android phone store?
The GSMA's eUICC specification allows up to 256 profiles stored on a single eSIM chip, though only one can be active at a time on most consumer handsets (GSMA eSIM specification overview). Practically, Samsung Galaxy S23 and Pixel 7 series cap active simultaneous profiles at two (one physical SIM plus one eSIM). You can install additional dormant profiles and switch between them without rescanning a QR code.
Do I need Wi-Fi to activate my eSIM after it's been installed?
You need an internet connection to download and provision the eSIM profile initially — either Wi-Fi or mobile data from your existing SIM. Once the profile is installed and the QR has been scanned, the eSIM activates by locking onto the host carrier's network automatically; no additional internet connection is required for that final handshake.
Will a carrier-locked Android phone work with a Roamfly eSIM?
No. If your phone is locked to a specific carrier — common with US phones bought on installment plans from AT&T, Verizon, or T-Mobile — it will reject any eSIM profile from another provider. Contact your carrier to request an unlock; US carriers are legally required to unlock devices after 60 days of active service under FCC guidelines (FCC consumer guide on unlocking mobile devices).