
Use eSIM for travel in 2026. Our guide helps you choose, activate & manage plans to avoid roaming fees. Stay connected globally.
You're probably reading this with a trip coming up and one nagging question in the back of your mind: how are you going to get data the moment you land?
Maybe you've done the old routine before. You get off a long flight, follow signs for baggage claim, then stop dead in front of a kiosk selling SIM cards you can't easily compare. One counter has a line. Another has a plan you don't fully understand. Your hotel address is on your phone, but you're trying not to use roaming until you know what it will cost. It's a small stress, but it hits at exactly the wrong time.
That's why so many travelers now use eSIM for travel. It removes the plastic card, the tiny SIM tray pin, and a lot of the guesswork. When configured properly, it delivers a consistent workflow before departure, immediately after landing, and during the trip when plans or networks don't align as expected.
The End of Airport SIM Card Scrambles
A few years ago, buying mobile data abroad often meant handling a tiny plastic SIM card at the worst possible moment. You'd land tired, try to compare plans in a hurry, then swap out your home SIM while hoping you wouldn't lose it in the bottom of your backpack.
What changed is the technology behind the process. GSMA's 2016 eSIM standard enabled remote SIM provisioning, which means you can download a carrier profile by QR code or link instead of inserting a physical SIM. By 2023, Statista reported 231 available eSIM consumer devices, up 45% from the previous year, with almost 400 network operators worldwide offering eSIM services (Statista's eSIM market overview).
That matters because eSIM isn't some experimental travel hack anymore. It's a mainstream way to get connected.
Here's the practical version. You buy a plan before the trip, install it over Wi‑Fi at home, keep it ready on your phone, then switch it on when you arrive. No kiosk. No SIM eject tool. No balancing a paper envelope with your old SIM card while dragging a suitcase.
Practical rule: If your trip starts with a late arrival, a tight connection, or an airport you've never used before, remove one problem from the day. Connectivity should already be handled before boarding.
For travelers, that's its primary appeal. An eSIM doesn't just replace a physical card. It turns connectivity into a simple travel task you can finish from your couch, the same way you download a boarding pass or save offline maps before leaving.
What Is an eSIM and How Does It Work for Travelers
An eSIM is a small programmable chip already built into your phone. Instead of sliding in a plastic SIM card, you install a digital carrier profile onto that chip.
Think of it as a built-in digital SIM
The easiest way to think about it is this: your phone already has the slot, but now it's digital.
You buy a travel plan online, receive activation details, then add that plan to your phone through settings, a QR code, or a carrier app. If you want a plain-language primer, RoamFly's guide to what an eSIM is shows the concept in the same simple way most travelers need it explained.
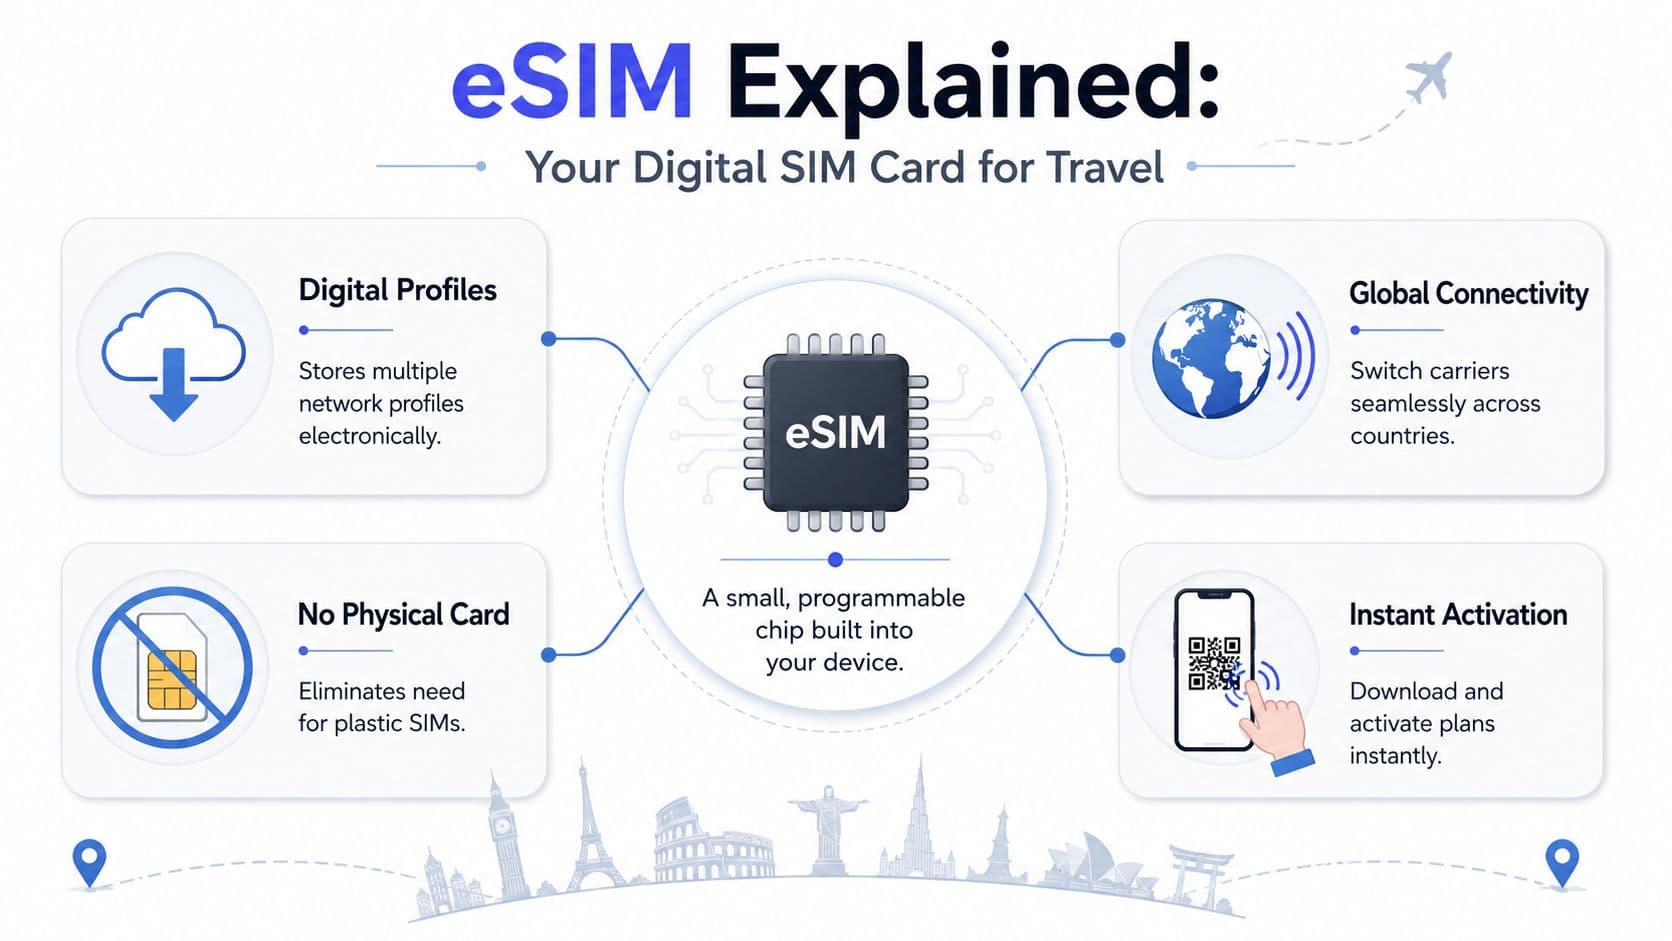
For travel, that changes the timing of everything. You don't need to wait until you're in the destination to sort out mobile data. You can choose the plan in advance, install it ahead of time, and keep it inactive until the trip starts if the provider allows that workflow.
That's where many people get confused. They assume eSIM means “no setup.” It doesn't. It means no physical swap. There's still a setup step, and that step matters.
A simple compatibility check before you buy
Before purchasing any eSIM for travel, check three things:
- Your phone supports eSIM
- Most newer iPhones, many Samsung Galaxy models, and many Google Pixel devices do, but support varies by model and market.
- Your phone works with any carrier
- If it's locked to one carrier, a travel eSIM may not install or may not work properly.
- Your destination is covered by the plan
- This matters most with regional plans, where one nearby country may still be excluded.
A simple example helps. If you're flying to one country for a week, you might install one travel data profile and leave your normal line in place. If you're moving between several countries, you might load a regional profile instead. Same phone, same chip, different downloadable profile.
The most useful mental shift is this: an eSIM is not a thing you hold. It's a plan you load.
Once that clicks, the rest gets much easier. You're not shopping for plastic. You're choosing a digital connection and deciding when to install it.
Why an eSIM Is a Game-Changer for Modern Travel
An eSIM helps most when you treat it as part of a travel workflow, not just a cheaper way to get data.
The practical win starts before you leave home. You can install the travel line in advance, keep your usual number on the phone, and land with fewer moving parts to sort out in the airport. That matters more than many guides admit. Airport Wi-Fi is often slow, sign-in pages fail at the worst moment, and buying connectivity after landing turns a simple task into a tired, time-sensitive one.
Cost still matters, of course. A travel eSIM can cost less than your home carrier's roaming, but the bigger benefit is control. You choose a plan with a known data allowance, you know which line is handling data, and you reduce the odds of surprise charges. If you are unsure how far a plan will go, this guide on how much 5GB of travel data really covers gives you a more useful starting point than the headline price alone.
There is also a setup advantage that shows up mid-trip.
Your home line can stay active for calls, texts, and login codes while the eSIM handles local or regional data. That split is like keeping your passport in one pocket and your boarding pass in another. Each item has one job, so you spend less time fumbling when something goes wrong. If a hotel app sends a verification text or your bank asks for a code, you are less likely to get stuck because you swapped out your main line.
Analysts at Juniper Research have pointed to strong growth in travel eSIM use, and their reporting also highlights the pricing gap travelers often see between roaming and travel data options (Juniper Research travel eSIM projections and roaming comparison). The useful takeaway is simple. Roaming should be compared, not assumed.
For frequent travelers, remote workers, and anyone crossing more than one border, a key advantage is that eSIM makes the whole trip easier to manage in stages. Before the trip, you install and label the line. On arrival, you switch data to the correct profile instead of hunting for a shop or begging the airport Wi-Fi to cooperate. Mid-trip, you can check usage or switch plans without opening the SIM tray.
That kind of clarity prevents small mistakes from turning into expensive ones.
Choosing Your Perfect eSIM Plan
Most travelers don't struggle with installing an eSIM. They struggle with buying the wrong plan.
The plan type shapes your whole experience. If you choose based only on the lowest headline price, you may end up short on data, boxed into one country, or slowed down by limits that weren't obvious at checkout.
Single-country, regional, and global plans
Here's the simple breakdown.
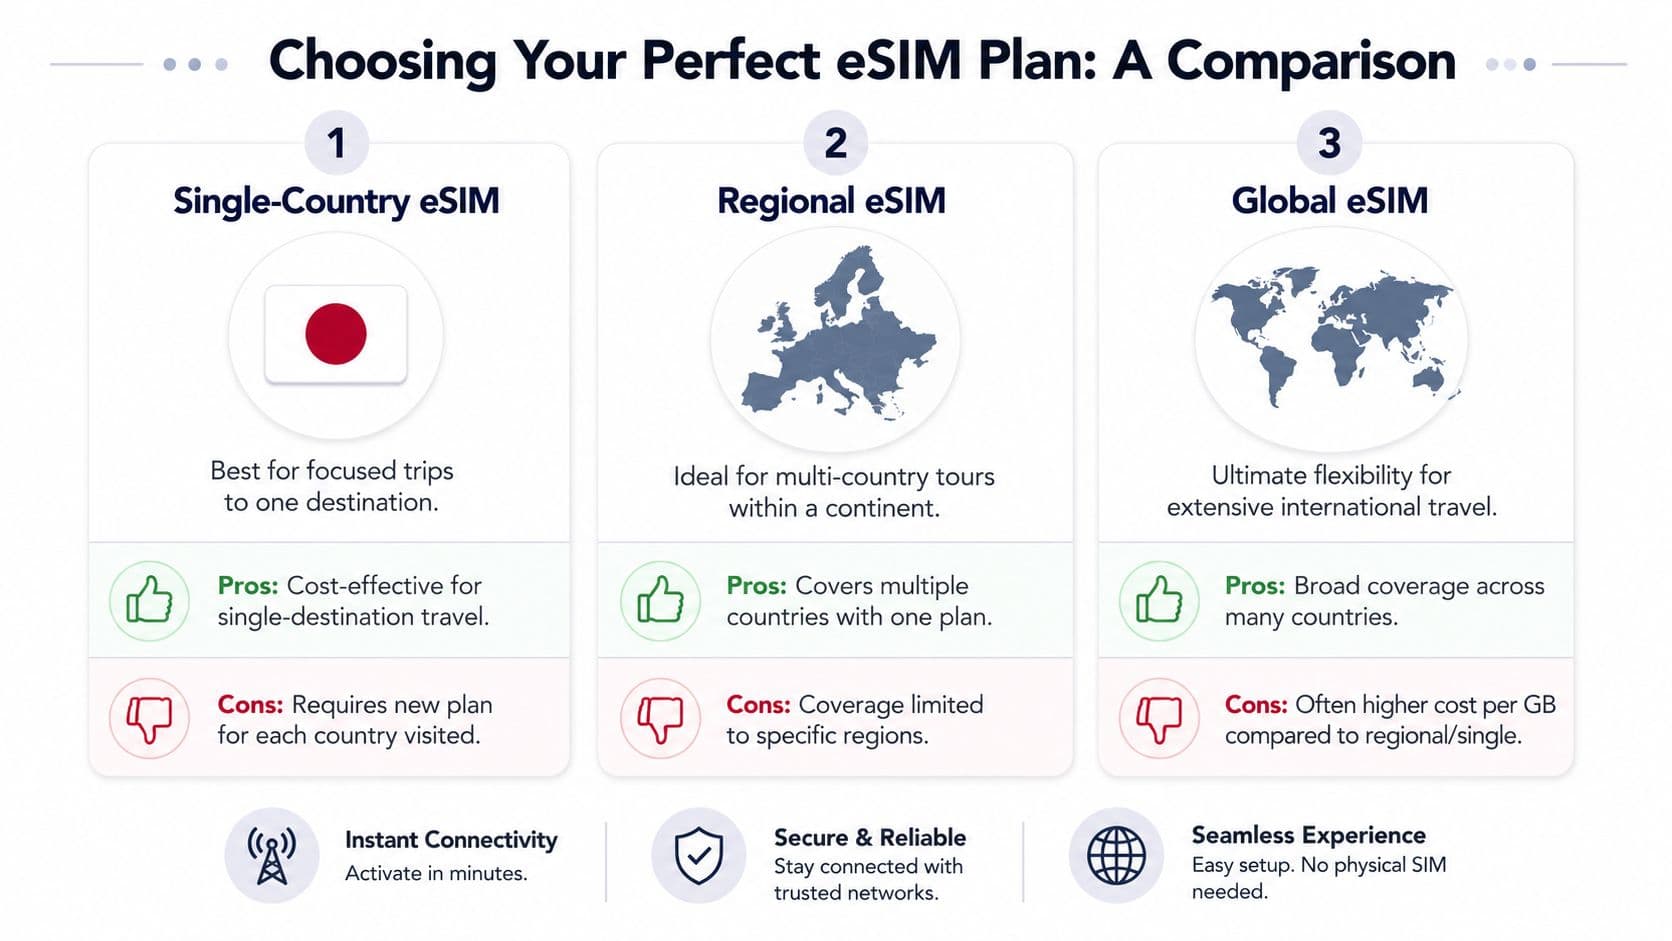
A single-country plan works best when you're staying in one place. If you're flying to Brazil for meetings and returning home without crossing borders, a local option such as a Brazil eSIM plan matches that kind of trip better than a broader package you won't fully use.
A regional plan is better when your route includes several countries in the same part of the world. Think of a train-heavy Europe trip, or a multi-stop trip across parts of Asia. One plan, one setup, less fiddling.
A global plan is for people whose itinerary is messy on purpose. Maybe you're a consultant, creator, or long-term traveler crossing regions and changing plans as you go. You'll usually pay for that flexibility, but you gain simplicity.
What unlimited really means
Many travelers often fall into this trap.
Many providers sell “unlimited” plans that commonly enforce a fair-use policy, reducing speed after a daily high-speed threshold, often around 3 to 5 GB per day. Heavy tasks like cloud backups or video uploads can hit that allowance quickly, so travelers who need steady performance should favor fixed-allowance plans and confirm whether hotspot use is allowed (TechRadar's travel eSIM plan guidance).
If you use your phone mostly for maps, messaging, rideshare apps, and light browsing, an unlimited-style plan may feel fine. If you upload large media files, tether a laptop, or back up photos while moving around all day, speed management matters a lot more than the word “unlimited.”
A good rule is to buy based on how you use data, not on the most comforting marketing label.
eSIM Plan Types at a Glance
| Plan Type | Best For | Typical Cost | Flexibility |
|---|---|---|---|
| Single-country | One destination, fixed itinerary | Usually lower for focused trips | Low outside that country |
| Regional | Multi-country trips in one region | Mid-range | Good within covered countries |
| Global | Long or unpredictable travel | Often higher per GB | Highest |
If you're unsure how quickly data disappears in daily use, this guide to what 5 GB of data looks like in practice helps translate plan size into real travel behavior.
When another option may be better
An eSIM for travel isn't automatically the cheapest answer.
A short vacation may not justify a separate purchase if your normal carrier already includes usable roaming. On the other end of the spectrum, a long stay in one country can make a local prepaid option more attractive, especially if you need voice, text, and a large amount of data.
Apple notes that local prepaid carrier options can be more affordable for data, voice, and text in some places, and local rules may require in-person ID checks. That's why convenience and lowest total cost don't always point to the same choice.
Step-by-Step eSIM Activation Before You Fly
The biggest mistake travelers make is waiting until arrival to do setup.
That sounds reasonable until you're standing in an airport trying to join weak Wi‑Fi, open an email with your QR code, and figure out phone settings while tired and jet-lagged. Installation is much easier at home.
For iPhone users, Apple says the phone must be connected to Wi‑Fi to activate eSIM, carriers typically deliver setup digitally by QR code or app, and on supported models two eSIMs can be active at once, which makes it possible to keep your home line available while the travel plan handles data (Apple's eSIM activation support page).
Here's a cleaner way to do it.
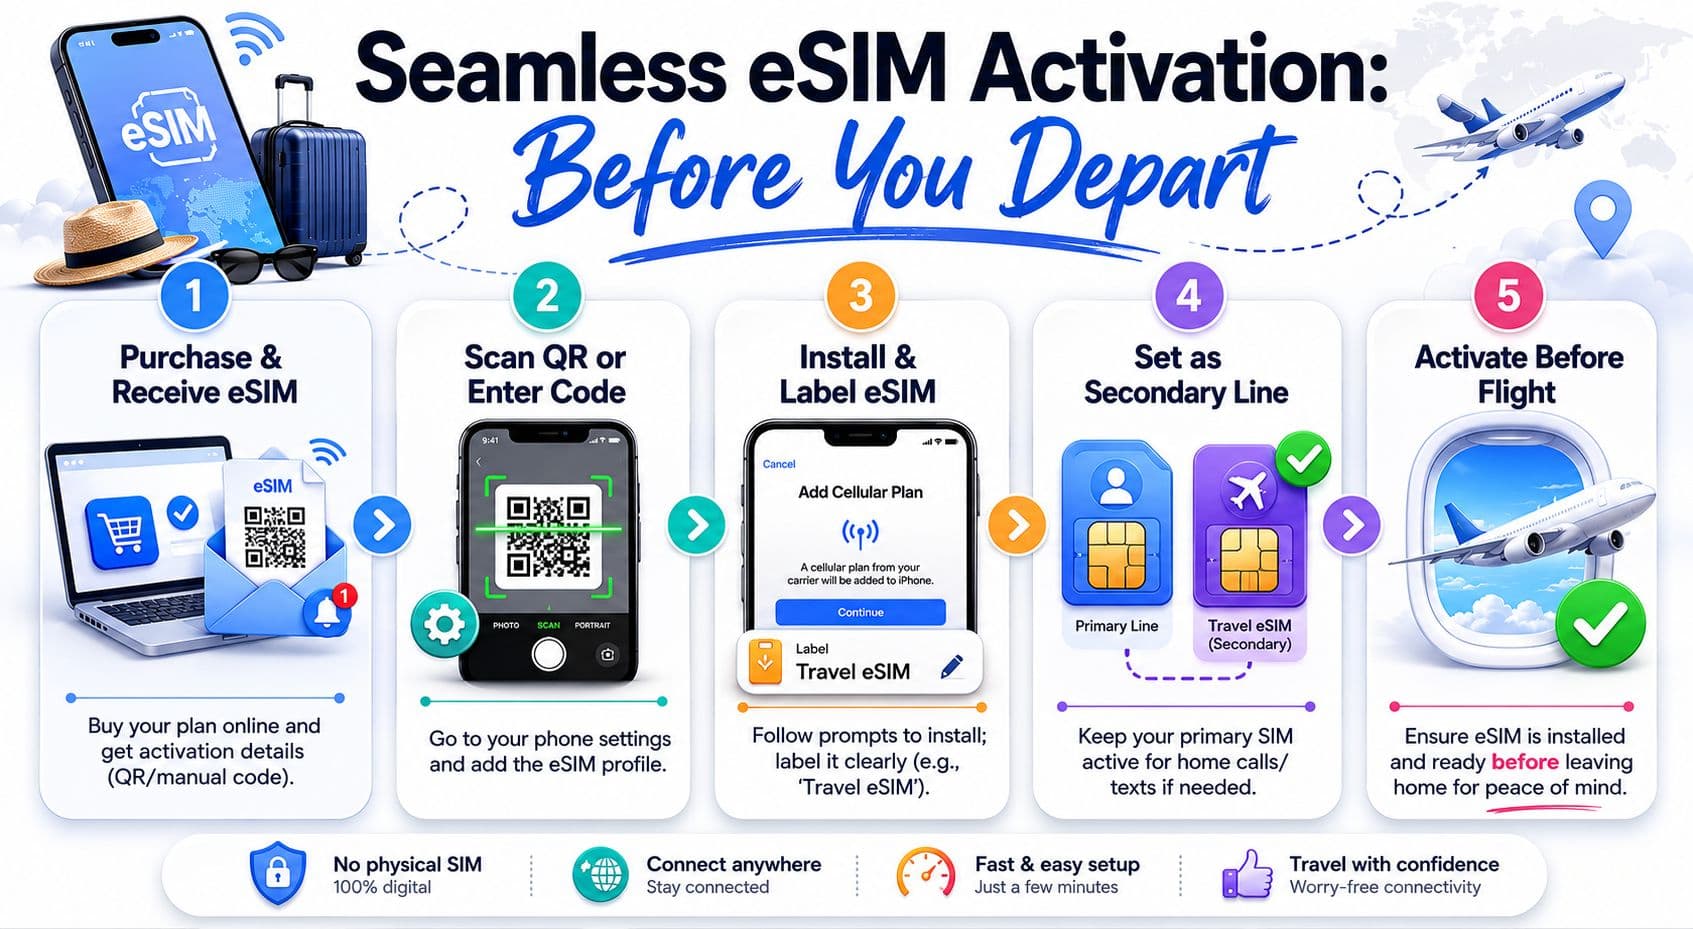
Your pre-flight checklist
- Confirm compatibility first
- Check that your phone supports eSIM and is unrestricted.
- Buy the plan while you're calm
- Purchase when you have time to read the destination coverage, validity period, and data rules.
- Save every activation detail
- Keep the QR code email, manual installation code if provided, and order confirmation in more than one place.
- Install over strong home Wi‑Fi
- This is the part many people skip, and it's the part that prevents airport frustration.
- Label the line clearly
- Use something obvious like “Japan Data” or “Europe Travel” so you don't mix it up with your primary line.
A setup reference like RoamFly's installation guide is useful here because the exact screens differ slightly by phone, but the logic stays the same.
How to install without rushing
The menu names vary, but the flow is usually straightforward:
- Open cellular or mobile network settings
- Look for an option to add eSIM or add cellular plan.
- Scan the QR code or enter details manually
- If your provider sent both, save both.
- Assign the plan a label
- This step matters more than people expect.
- Decide which line handles what
- Many travelers keep the primary line for calls and texts, then assign travel data to the eSIM.
- Check data settings before departure
- Make sure you know which line is selected for mobile data and whether roaming needs to be enabled on the travel line.
A short walkthrough can also help if you want to see the flow before touching your settings.
Don't leave activation as an airport task. Leave it as an airport result.
Your backup plan if setup goes sideways
Even when you install at home, give yourself a fallback.
- Take screenshots
- Save the QR code, plan details, and support steps to your photo library.
- Keep a second copy offline
- Email is fine, but offline notes or screenshots are better if you can't log in later.
- Know how to switch lines manually
- If the phone chooses the wrong line after landing, you want to fix that in seconds.
- Test your understanding, not just the install
- You don't need the plan to be active yet. You do need to know where the settings live.
That small bit of preparation is what makes an eSIM feel easy in real travel, not just in a tutorial.
Troubleshooting Common eSIM Issues on the Road
Most eSIM problems feel bigger than they are. The trick is to diagnose them in the right order instead of tapping random settings while stressed.
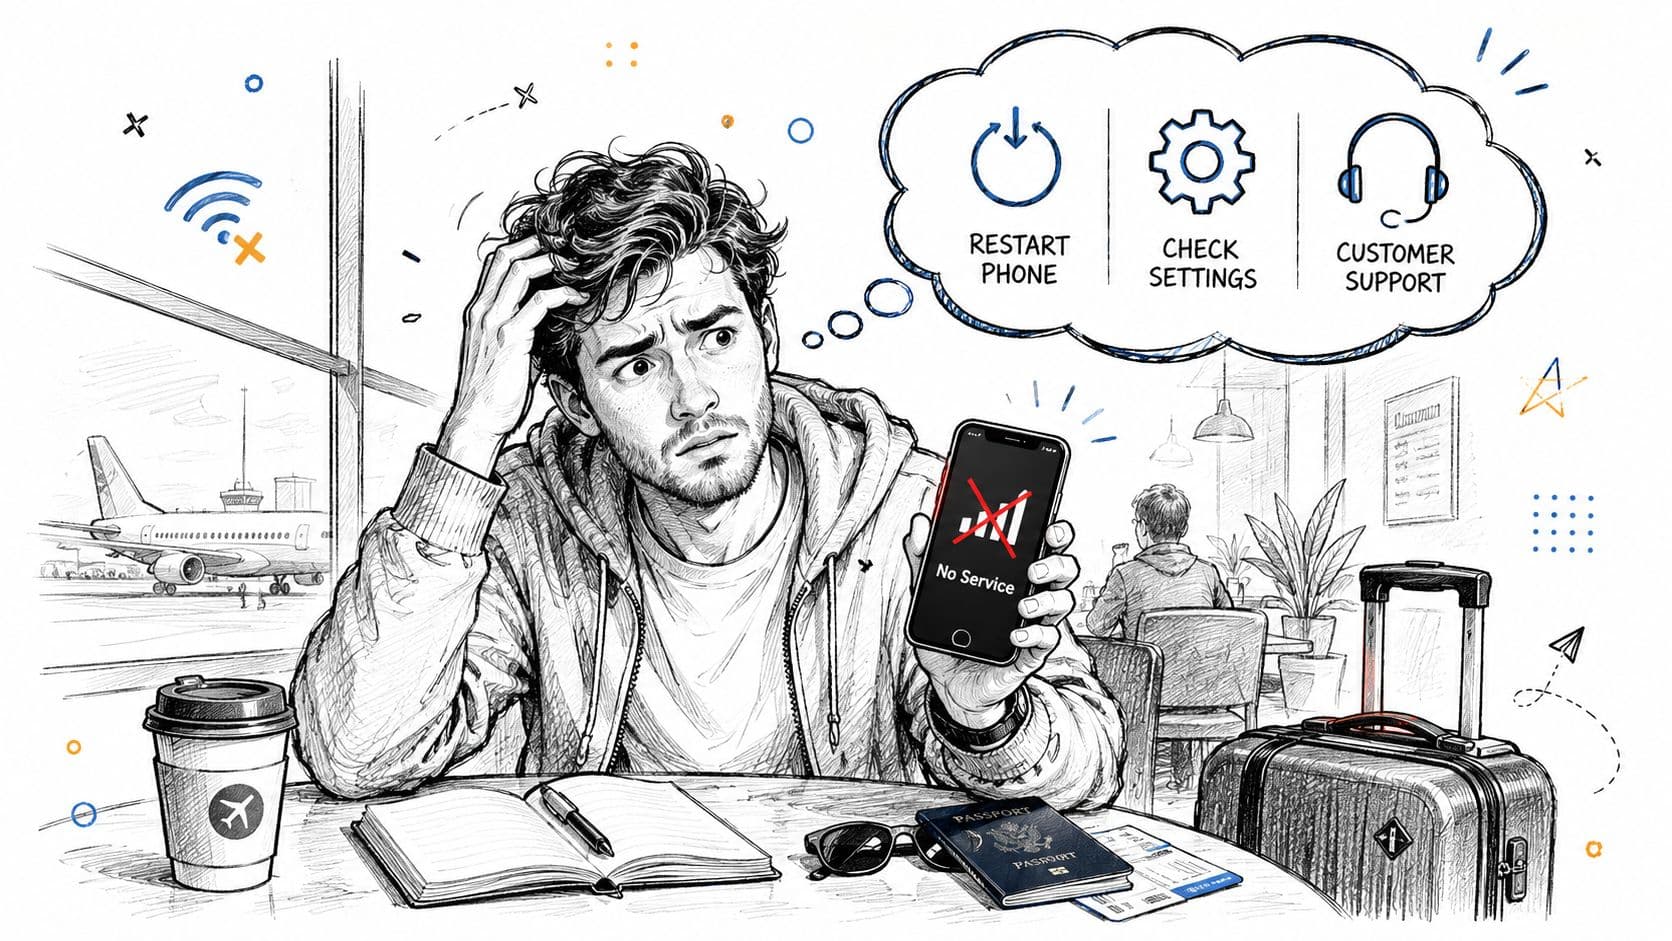
You landed and nothing connects
Start with the basics.
Check that the eSIM line is turned on. Confirm it's the line selected for mobile data. If your provider requires it, make sure data roaming is enabled for that travel line. Then toggle airplane mode off and on and wait a minute.
If that still doesn't work, try manual network selection. Phones sometimes cling to the wrong network on arrival.
Slow down and check one setting at a time. Most connection failures come from line selection, roaming settings, or incomplete activation.
Your data works, but it's suddenly slow
This is often a plan issue, not a phone issue.
Many travel plans reduce speed after high-speed usage is exhausted, especially on plans marketed as unlimited. If maps and messages still work but video uploads drag or hotspot performance collapses, you may have hit the plan's faster-data limit.
At that point, stop treating it like a signal mystery. Check your usage, review your plan terms, and decide whether you need more data or a different plan style for the next leg of the trip.
You forgot to install before the trip
This is the failure mode many glossy guides skip.
Standard setup advice often assumes you can just scan a QR code on arrival, but Apple says iPhone users need a Wi‑Fi connection to install eSIMs. That creates a real problem when airport Wi‑Fi is unreliable or stuck behind a captive portal, and many guides don't explain fallback options or delayed QR delivery clearly (Airalo's eSIM information pages).
If this happens, do the practical thing:
- Find stable Wi‑Fi somewhere calmer
- A café, hotel lobby, or coworking space is often easier than the airport.
- Use manual activation details if available
- A QR code isn't always the only path.
- Restart the process from the beginning
- Don't assume the first failed attempt partially completed.
- Keep one backup option in mind
- Your home roaming, hotel Wi‑Fi, or a local shop may bridge the gap if you need immediate access.
The goal isn't to avoid every hiccup. It's to avoid panic when one shows up.
Your Smart eSIM Travel Workflow
You land, open your phone, and need three things right away: a signal, directions, and a backup plan if the first setup step fails. That is the right way to use eSIM for travel. Treat it like an airport-to-hotel workflow, not a one-time purchase.
1. Pre-trip: set up the safety net
Do these before you leave home, while you still have stable Wi‑Fi and time to fix mistakes:
- Confirm your phone supports eSIM and is not carrier-locked
- Choose a plan that fits your route, trip length, and data habits
- Install the eSIM before departure, not in the arrivals hall
- Label the line clearly, such as “Japan data” or “Europe trip”
- Save the QR code, activation details, and plan name offline
- Keep one fallback option, such as temporary home roaming or your hotel Wi‑Fi details
This phase matters for one practical reason. Airport Wi‑Fi is often the weakest link in the whole process.
2. Arrival: verify before you walk out of the terminal
Once you land, run a quick two-minute check before you depend on the connection:
- Turn on the travel eSIM
- Make sure mobile data is assigned to the correct line
- Wait for signal bars and test one low-stakes task, like loading maps or sending a message
- Leave your primary line settings alone unless you know you need to change them
- If data does not work, move to your saved activation notes instead of trying random settings
This is like checking your hotel key at the desk instead of discovering it fails at your room door. A small test early saves time later.
3. Mid-trip: watch for quiet plan limits
The failure point in the middle of a trip is rarely installation. It is assuming the plan works the same on day six as it did on day one.
Use this quick check if your connection feels worse:
- Maps and chat work, but uploads crawl. You may have used your high-speed data
- Your phone shows signal, but nothing loads. Recheck which line is set for data
- Hotspot use drains data faster than expected. Review your remaining allowance
- A border crossing changes performance. Confirm your plan covers the new country
The goal is not to stare at settings every day. It is to notice the difference between a setup issue, a coverage issue, and a plan-limit issue.
4. End of trip: leave yourself a better setup for next time
Before your next flight, your future self will thank you for five minutes of cleanup:
- Disable or remove expired eSIMs you no longer need
- Keep a note on which provider, region, and data size worked well
- Record any surprise limits, especially around hotspot use or speed drops
That turns each trip into a better starting point for the next one.
If you want a simple place to buy and manage an eSIM before your next trip, RoamFly is one option to consider. It offers local, regional, and global travel data plans, plus setup resources that can make pre-trip installation easier when you want to be connected soon after landing.