
Planning a trip? Discover the best eSIM for Japan in our 2026 guide. Learn to choose, install, & activate your plan for instant connectivity.
You've probably done this before. Your plane lands in Tokyo, everyone stands up at once, and you suddenly need your phone for everything. Immigration forms. Google Maps. Messaging family that you arrived. Finding the train. Pulling up your hotel booking because the airport WiFi signs aren't where you expected.
A few years ago, the usual routine was clunky. You'd hunt for free WiFi, queue for a rental counter, or swap in a tiny plastic SIM card while half-awake from the flight. Japan made that process easier than many countries, but it was still one more airport task to deal with when you were tired and carrying bags.
That's why so many travelers now choose an eSIM for Japan. You buy the plan before the trip, install it while you're still at home on stable WiFi, and then your phone connects when you arrive. No SIM tray tool. No airport kiosk. No awkward moment where you can't message anyone until you get through arrivals.
Introduction Land in Japan Connected
You land at Haneda or Narita, switch off airplane mode, and suddenly a lot depends on your phone working right away. The train app needs data. Your hotel check-in email needs to load. If you are meeting someone, you may need to reply before you even reach the station.
That first hour in Japan is where a good eSIM earns its keep.
Many travel eSIMs for Japan can be installed before departure and activated by QR code or app, so your phone is ready soon after arrival, as explained in Mobal's Japan eSIM guide. The practical benefit is simple. You sort out connectivity at home, not while tired, carrying luggage, and trying to read station signs.
Older options still work, but they each create a different kind of hassle. Pocket WiFi is a bit like renting a second phone battery that also has to stay with you all day. A physical SIM means opening your SIM tray and keeping your home SIM somewhere safe. Free airport or station WiFi can help in a pinch, but it is not something you want to depend on while changing terminals, riding trains, or heading into underground stations.
There is also a more important question than many guides admit. What happens after the airport?
Price matters, but Japan trips often expose the limits of choosing on price alone. Some travelers only need data for maps, translation, and messaging. Others need more. You may want a real Japanese phone number for reservations or local callbacks. You may be visiting smaller towns where network coverage matters more than headline speed. You may also discover that an “unlimited” plan has rules on hotspot use, which matters if you plan to tether a laptop on the Shinkansen or share data with a travel companion.
A better way to choose an eSIM is to treat it like packing shoes for a trip. The cheapest pair might be fine for city sidewalks, but not for rain, countryside stops, or long walking days. Japan eSIMs work the same way. The right pick depends on how you will travel, where you will go, and whether you need just data or something closer to a full phone service.
For many travelers, that preparation removes the most stressful part of arrival. You step off the plane with directions, bookings, and messages already within reach.
What Is an eSIM and Why Is It Perfect for Japan
An eSIM is a SIM profile built into your phone. Instead of popping out a tray and inserting a tiny plastic card, you add a mobile plan digitally, usually by scanning a QR code or using an app.
That simple change matters more than it sounds.
For a first-time traveler, the easiest way to understand eSIM is this: your phone already has the hardware it needs. You are not changing the phone itself. You are loading a new set of carrier details so the phone knows which network plan to use. It works a lot like adding a new boarding pass to your wallet app. The trip changes, but the phone stays the same.

What actually changes with an eSIM
A physical SIM and an eSIM do the same job. Both identify your phone to a mobile network. The difference is how you install and manage that connection.
With a physical SIM, you need to handle a card:
- remove the SIM tray
- store your home SIM safely
- insert the new one
- swap back later
With an eSIM, the setup is digital:
- buy the plan online
- scan a QR code or open the provider app
- install the plan on the phone
- turn it on when you need it
That is the technical shift. Same purpose, different setup.
Why that fits Japan particularly well
Japan tends to reward preparation. Train tickets, hotel check-ins, reservation messages, and map directions all go more smoothly when your phone is ready the moment you need it. eSIM fits that style of travel because you can sort out your mobile setup before departure instead of solving it after a long flight.
It also gives you more flexibility than many first-time travelers expect. Some Japan eSIMs are data-only. Others may include a real phone number, which can matter if a restaurant, hotel, or local tour needs to call or text you. Some plans are better for major cities, while others matter more if your route includes smaller towns or mountain areas where carrier coverage becomes a practical question, not just a spec on a product page.
And there is one detail many travelers miss. “Unlimited” does not always mean unrestricted. A plan can offer plenty of phone data but still limit hotspot use, slow down after heavy use, or make tethering awkward. If you plan to work from a laptop on the train, share data with a travel partner, or keep a backup connection for rural stops, those trade-offs matter more than the headline price.
What confuses people at first
The biggest misunderstanding is thinking an eSIM is a special kind of network.
It usually is not.
An eSIM is just the delivery method for the plan. The actual service still depends on the carrier behind it. That is why two Japan eSIMs can look similar on the surface but feel very different in practice. One might be perfect for city sightseeing and messaging. Another might suit a longer trip where you want tethering, stronger coverage outside big urban areas, or the option of a real local number.
Once that clicks, shopping gets easier. You stop asking only, “How much data do I get?” and start asking the more useful questions: “Will this work where I'm going?” “Can I hotspot?” “Do I need calls or just data?” “If something goes wrong, can I switch plans without touching the SIM tray?”
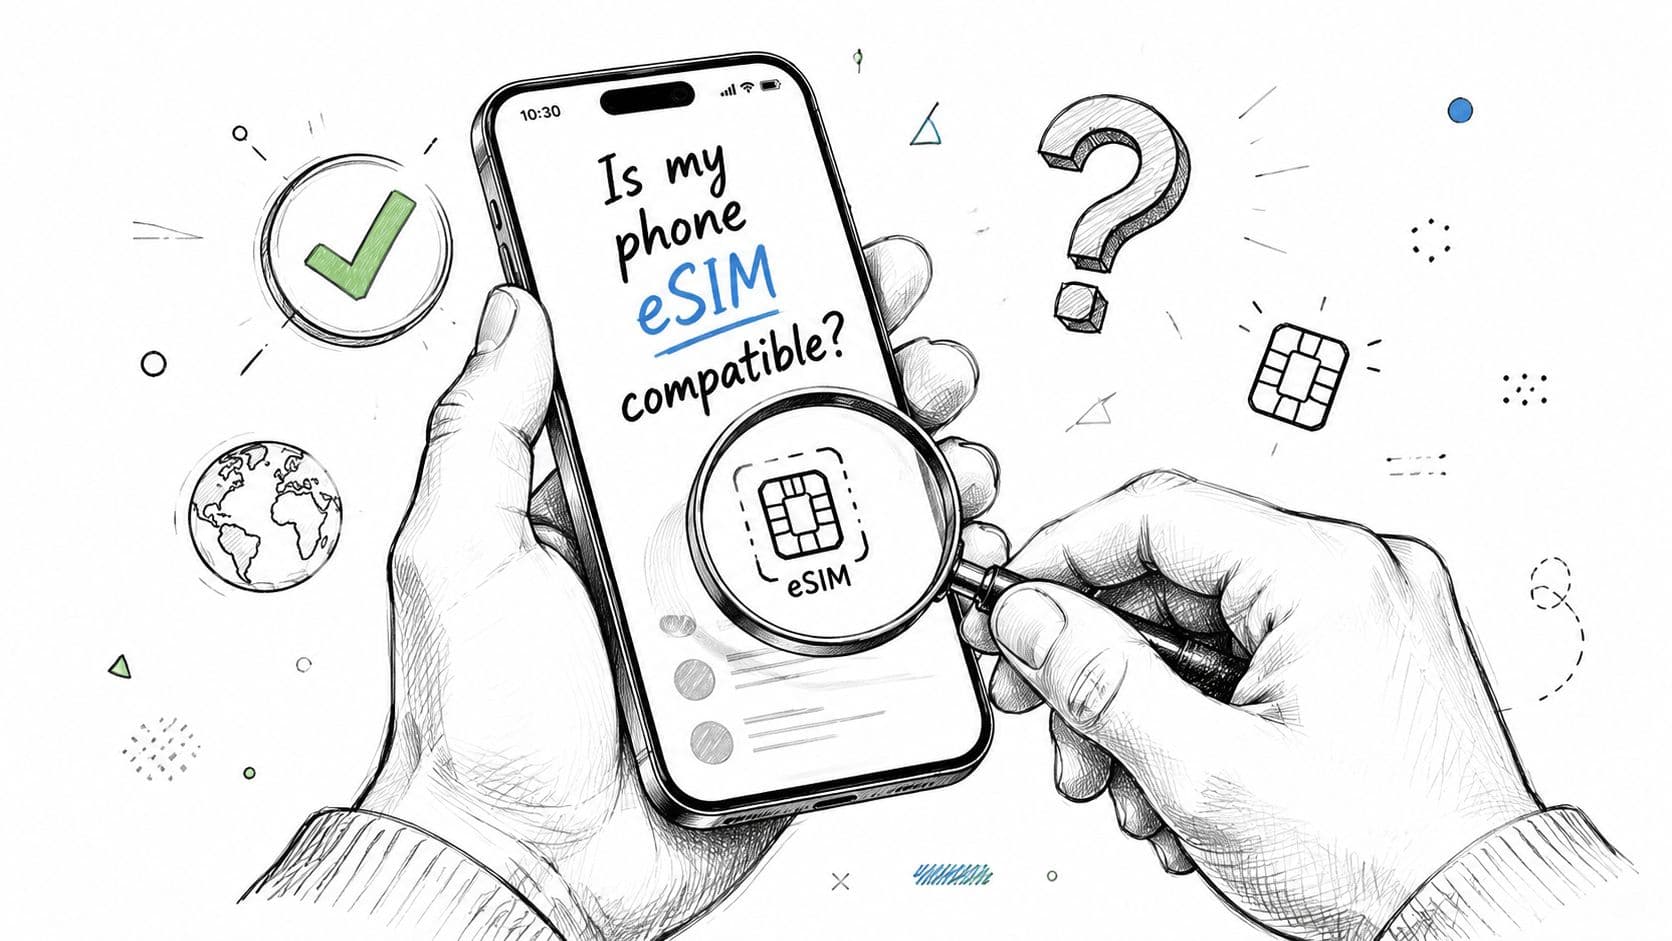
Checking Your Device for eSIM Compatibility
Before you buy anything, make sure your phone can use an eSIM. This is the one step people skip when they're excited, and it's the step that causes the most frustration later.
You need two things to be true. Your phone has to support eSIM, and it has to be compatible with multiple carriers. If your carrier still restricts the phone to its own network, a Japan travel eSIM usually won't work.
On iPhone
Open your iPhone and check these places:
- Settings
- General
- About
Look for signs that the phone supports digital cellular setup. You can also go to:
- Settings
- Cellular or Mobile Data
- Look for Add eSIM or a similar option
If you want a broader device reference, RoamFly has a compatible devices list for eSIM-ready phones.
On Android
Android menus vary by brand, which is why this part feels more confusing. Start here:
- Settings
- Network & Internet, Connections, or SIM Manager
- Look for Add eSIM, Download SIM, or SIMs
You can also dial \*#06# on many phones. If the device shows an EID, that usually indicates eSIM capability.
The unlocked phone check
A phone can support eSIM and still fail if it's locked. That means your carrier only allows service on its own network. Travel eSIMs need the phone to accept another provider's profile.
The safest move is to ask your home carrier directly:
- Ask if your phone is free of carrier ties: Don't assume it is because you finished paying it off.
- Ask if eSIM is enabled: Some carriers handle device settings differently.
- Ask before travel day: You don't want to discover a device limitation while boarding.
If your phone is locked, the issue isn't “Japan eSIMs don't work.” The issue is that your phone won't accept them.
A quick sanity checklist
Use this before checkout:
- Device support: You can see an eSIM option in settings.
- Carrier status: Your home provider confirms the phone is free from carrier restrictions.
- Software updates: Your phone is current enough to avoid setup glitches.
- Screenshot your setup menus: Helpful if you need to troubleshoot after landing.
If all four check out, you're in good shape.
Choosing Your Ideal Japan eSIM Plan
Picking an eSIM for Japan isn't really about finding the cheapest sticker price. It's about matching the plan to how you travel. Someone who uses maps, messaging, and restaurant lookups needs a different plan than a creator uploading footage from the train or a consultant hotspotting a laptop between meetings.
Japan's travel eSIM market is broad because most products ride on the country's three major mobile networks: NTT Docomo, KDDI au, and SoftBank. That has led to a wide mix of plans, including examples such as 1 GB for 7 days at US$3.99, 3 GB for 30 days at US$7.99, and larger or unlimited-style offers with daily high-speed caps, according to NINJA WiFi's Japan eSIM pricing overview.
Start with your travel style
Ask yourself these questions first:
- How long is your trip: A weekend city break and a month-long work stay shouldn't use the same buying logic.
- How much video do you watch or upload: Streaming and cloud backup eat data fast.
- Will you hotspot a laptop or tablet: This matters more than people think.
- Are you staying only in major cities: Tokyo and Osaka planning is different from countryside travel.
If your trip is mostly urban sightseeing, a smaller fixed-data plan often works well. If you expect heavy use, “unlimited” can look attractive, but the fine print matters more in Japan than many buyers realize.
Local, regional, or global
Not every plan is Japan-only. You'll usually see three categories.
| Plan Type | Best For | Typical Coverage | Pros | Cons |
|---|---|---|---|---|
| Local | Travelers staying only in Japan | Japan | Usually simple and focused | Not useful if you continue to another country |
| Regional | Multi-country Asia trips | Japan plus nearby countries | One setup for several borders | May cost more than a Japan-only plan |
| Global | Frequent international travelers | Broad international coverage | Useful if Japan is one stop on a longer trip | Can be less tailored to one country |
If you want a marketplace-style option for Japan plans, RoamFly's Japan eSIM page is one example of a provider that offers local travel data plans through an app and email-based delivery.
The three practical what-ifs that matter most
Price comparisons often miss the questions that affect your trip.
#### Needing a real Japanese phone number
Many tourist eSIMs are data-only. That means no local phone number, no traditional voice, and no SMS. For a short vacation, that may be fine. For restaurant reservations, deliveries, local verification, or some business workflows, it can become the hidden problem.
If you know you need a Japanese number, don't assume any travel eSIM solves that.
#### Going beyond big cities
A plan that looks great on price can still be the wrong choice if you're heading into rural areas, rail corridors, or places where indoor reception matters more than headline marketing. Carrier choice matters in Japan, especially once you leave the easy urban core.
#### Buying “unlimited” without checking tethering
Some unlimited-style plans still have fair usage limits, daily high-speed caps, or hotspot restrictions. That's why the best plan for a phone-only vacation can be a poor fit for remote work.
Cheap is only cheap if it fits your trip. A low-cost plan with weak tethering or a strict daily cap can end up being the inconvenient option.
A simple buying rule
Choose your plan in this order:
- Coverage confidence
- Hotspot policy
- Data amount or daily cap
- Price
That order saves more travel stress than sorting only by cost.
How to Install Your eSIM Before You Fly iOS and Android
You do not want your first eSIM setup attempt to happen after a long flight, with airport WiFi lagging and a train to catch. The low-stress approach is simple. Install the eSIM at home while you still have stable internet. Then let it connect in Japan when you arrive.
Ubigi describes this as a setup where you receive the QR code after purchase, add the eSIM before departure, and start using it once you land in Japan and connect there, as explained on Ubigi's Japan data plan page. The practical benefit is straightforward. You can sort everything out while calm, without burning time in the airport trying to read tiny settings menus.

Before you touch settings
Set yourself up first. Five quiet minutes at home saves a lot of confusion later.
Have these ready:
- Your provider email with the QR code or manual activation details
- Stable WiFi so the profile downloads properly
- Your physical SIM still in the phone if you plan to keep your usual number for calls or texts
- A clear label name such as Japan eSIM so you can tell your lines apart later
That label matters more than it sounds. Once your phone shows two lines, you want to know instantly which one is your home number and which one is your Japan data line.
If you have used another travel eSIM before, the process will feel familiar. A plan like Brazil eSIM, Unlimited / 1 day installs as the same kind of digital SIM profile. The destination is different, but the setup logic is almost identical.
iPhone setup
On iPhone, the process is usually quick:
- Open Settings
- Tap Cellular or Mobile Data
- Tap Add eSIM
- Choose Use QR Code if your provider sent one
- Scan the code from your email or from another screen
- Follow the prompts to add the plan
- Label the line something obvious, such as Japan eSIM
- Leave your home SIM as the default for calls if you still want access to your regular number
One point trips up first-time users. Installing the eSIM is not the same as switching all your data to it right away. In most cases, you can add the profile now and wait until you land in Japan to make it your mobile data line.
If you want a brand-specific walkthrough, RoamFly keeps a step by step travel eSIM installation guide that shows the general process.
Android setup
Android is less uniform because Samsung, Pixel, Xiaomi, and other brands name menus differently. The path changes, but the job is the same.
A typical flow looks like this:
- Open Settings
- Go to Network & Internet, Connections, or SIM Manager
- Tap Add eSIM or Download SIM
- Scan the QR code or enter the details manually
- Confirm installation
- Rename the line if your phone gives you that option
- Keep your usual SIM active for calls and texts if needed
If the QR code does not scan, do not panic. Many providers also send manual setup details. That is a normal backup option, not a sign that anything is broken.
What to change after you land
Once you are in Japan, make a few deliberate changes instead of tapping through prompts too fast:
- Turn on the Japan eSIM
- Set it as your mobile data line
- Enable data roaming for that eSIM if your provider requires it
- Keep data roaming off on your home SIM
- Restart the phone if the local network does not appear right away
This is also the moment to think about your real trip needs. If your home SIM is the only line tied to your regular number, keep it active for calls or verification texts if your carrier charges are acceptable. If your Japan eSIM is data-only, that is normal, but it means apps like WhatsApp, FaceTime, or Line may matter more than regular calling during your trip.
Install first. Switch settings after landing. That order keeps the whole process much calmer.
Troubleshooting Common eSIM Issues in Japan
Most eSIM problems in Japan are small setup issues, not signs that the whole thing is broken. When people say, “My eSIM doesn't work,” the fix is often one settings toggle away.
Carrier diversity also matters here. Some Japan eSIM plans can connect to multiple major networks such as NTT Docomo, SoftBank, and KDDI/au, which can make them more resilient in congested areas than a single-carrier product. SimCorner also notes that one tested eSIM on KDDI au averaged around 267 Mbps download, showing how strong performance can be when the connection is set up properly on a good local network, as described in SimCorner's Japan eSIM comparison.
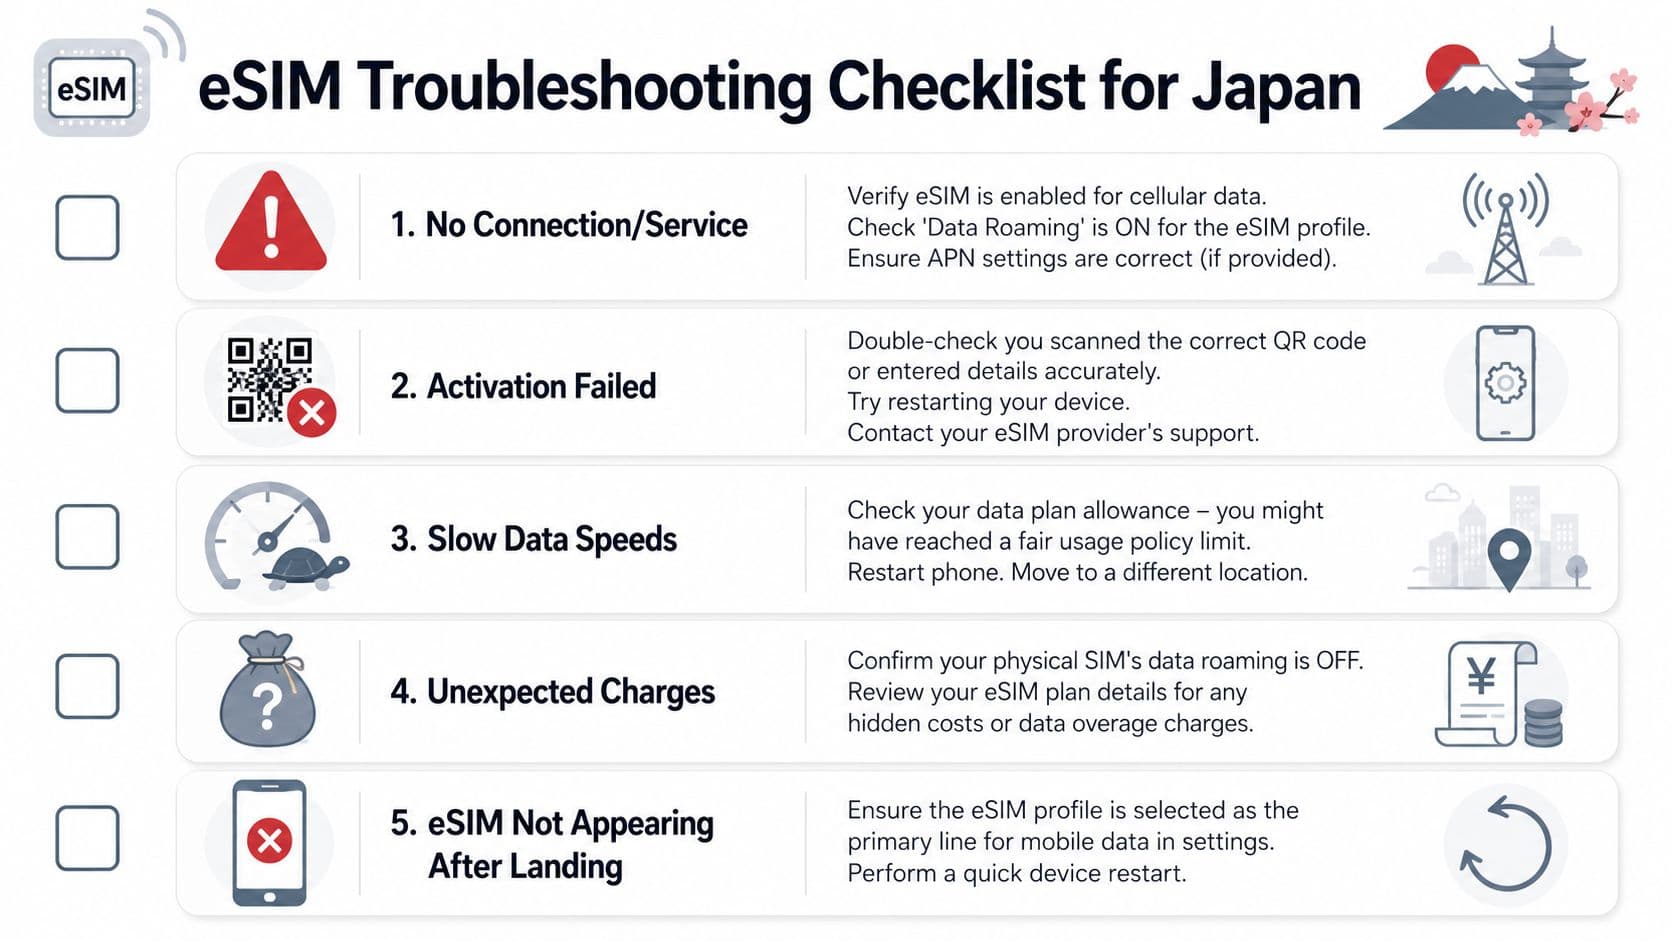
No service after landing
This is the classic one. You installed the eSIM at home, landed in Japan, and nothing happens.
Common fixes:
- Check that the eSIM is turned on: Some phones keep the profile installed but inactive.
- Make sure it's selected for mobile data: Your phone may still be trying to use the home SIM.
- Turn on data roaming for the eSIM: Many travel eSIMs need this setting.
- Restart the phone: It sounds basic because it is, and it often works.
Data connects but nothing loads
If you have bars but apps won't load, check these next:
- APN settings: Some providers include APN details in the setup email.
- Wrong line selected: Calls may be on one SIM while data is still assigned to another.
- Temporary activation lag: Give it a minute after first connection.
Data feels slow
Slow speeds don't always mean a bad provider. In Japan, congestion can vary by location and time. Indoor stations, crowded districts, and rail hubs can all feel different.
Try this:
- Move a short distance: Even one station exit can help.
- Toggle airplane mode on and off: This forces a fresh network grab.
- Switch network selection from automatic to manual: If your plan supports more than one partner network, another option may perform better.
- Check for daily cap behavior: Some unlimited-style plans reduce high-speed access after a daily threshold.
Unexpected roaming charges
This usually happens because the travel eSIM worked, but the home SIM was still allowed to use data too.
Use this rule:
- Travel eSIM data roaming on if required
- Home SIM data roaming off
- Travel eSIM selected for mobile data
- Home SIM kept only for calls or texts if needed
If the phone is confused about which line should handle data, your bill can get confused too.
Frequently Asked Questions About Using an eSIM in Japan
Do Japan eSIMs come with a Japanese phone number
Usually, no. Most tourist-focused Japan eSIMs are data-only, which means they do not include traditional voice or SMS service. That matters more than many comparison pages admit, especially if you need local reservations, delivery coordination, or services that require number verification, as explained in NINJA WiFi's guide to what tourists need to know before landing.
If a local number is important for your trip, check that before purchase. Don't assume “eSIM” means “full local mobile plan.”
Will my eSIM work in rural areas or on the Shinkansen
Often yes, but this depends on the underlying carrier access and whether your plan supports one network or several. If your itinerary includes smaller towns, mountain areas, or long rail travel, focus less on the cheapest listing and more on which Japanese network partners the plan uses.
That's one of the biggest practical gaps in many buying guides. Rural reliability, indoor performance, and hotspot support often matter more than saving a small amount upfront.
Can I use my physical SIM and an eSIM at the same time
On many modern phones, yes. That's one of the best parts of using an eSIM for Japan. You can often keep your home SIM active for calls or incoming texts while using the Japan eSIM for data.
The key is to assign each line intentionally. If you leave both lines free to use mobile data, the phone may choose the wrong one.
What if I run out of data in Japan
That depends on the provider. Some plans allow top-ups in an app. Others require buying a new plan. A few reusable eSIM profiles make this easier because you don't need to install a brand-new profile every time.
If you're the type who uses a lot of tethering, uploads video, or works remotely, it's smarter to plan for that upfront than to hope public WiFi fills the gap.
If you want a simple way to sort through travel data options before your trip, RoamFly is one route to compare and buy eSIM plans online, then install them before departure so your phone is ready when you land in Japan.