Everything you need for eSIM for Canada travel — network coverage, real prices, top plans, and how to activate before your flight boards.
# eSIM for Canada Travel: Coverage, Cost, and Best Plans
Verizon charges $10 per day to use your existing plan in Canada through TravelPass — which sounds reasonable until you're in Vancouver for two weeks and the bill lands at $140 before you've paid for a single coffee (Verizon TravelPass Canada pricing). AT&T's International Day Pass runs the same $10 daily rate. T-Mobile's Magenta plan includes Canada data, but throttles you to 128 Kbps after a soft cap — fast enough to receive a text, not fast enough to load Google Maps while you're navigating the Sea-to-Sky Highway toward Whistler.
Canadian pay-as-you-go roaming is no gentler on your wallet. Rogers charges visiting subscribers up to $15 per day on its Roam Like Home add-on; Bell matches that rate for most US and European source carriers. Telus sits in the same range. These aren't fringe prices from carriers caught off guard by demand — they're the deliberate floor of a market that the CRTC's own 2023 wireless report flagged as among the highest in the G7 for international roaming costs (CRTC Communications Monitoring Report 2023).
The compounding problem is unpredictability. Day-pass billing activates the moment your phone connects to a Canadian tower, even if you crossed the border just to grab gas in Blaine, Washington. A four-hour side trip from Bellingham becomes a $10 line item. Make that trip three times in a week and you've spent $30 on connectivity you barely used.
Data-only eSIM plans priced for a fixed trip length sidestep all of it. A 10 GB / 15-day Canada eSIM from Roamfly costs a fraction of two days on a carrier day-pass — and the price is locked at purchase, not metered by the day. You know the cost before you land at YVR or YYZ.
Speed is not sacrificed for that price difference. Canada eSIM plans on Roamfly route through Rogers, Bell, or Telus infrastructure directly — the same towers your day-pass roaming would hit, without the per-day markup layered on top. What you lose is voice calling and SMS on that line, which matters less if you use WhatsApp, FaceTime Audio, or any VoIP app and keep your home SIM in the second slot for emergencies.
The math is blunt: 15 days of Verizon TravelPass costs $150. An esim for canada travel covering the same window costs significantly less and delivers faster, uncapped data on the same physical network. For most leisure and business travelers coming from the US, the carrier day-pass exists as a convenience tax — one you can stop paying the moment you scan a QR code before boarding.

Table of contents
- Why Canadian carrier roaming rates will ruin your trip budget
- What an eSIM actually is — and why Canada is a good fit
- Canada's three main networks: Rogers, Bell, and Telus
- 5G coverage in Canada's major cities
- Rural and highway dead zones: what the maps don't show
- How much data you actually need for a Canada trip
- Choosing between a 7-day, 15-day, and 30-day Canada eSIM plan
- US-to-Canada border crossings: keeping one line active on both sides
- iPhone and Canada eSIM: carrier lock, iOS settings, and known issues
- Android and Canada eSIM: Pixel, Samsung Galaxy, and others
- When to activate your Canada eSIM — before, during, or after landing
- Hotspot and tethering: sharing your Canada eSIM with a laptop
- Canada eSIM vs local SIM card at the airport kiosk
- Canada eSIM vs international roaming from your home carrier
- Specialty trips: Banff, the Yukon, and cruise ports
- Business travelers: calling, SMS, and Canada eSIM data-only limits
- Pairing your Canada eSIM with a US plan for cross-border trips
- Get connected before you leave
- Frequently asked questions
What an eSIM actually is — and why Canada is a good fit
Your phone already has the SIM. It's been there since the factory soldered it onto the motherboard — a chip about the size of a grain of rice, programmable over the air, no tray required. An eSIM (embedded SIM) stores carrier credentials digitally, which means you download a plan the same way you'd download an app, and your phone switches networks without you touching a physical card.
The practical upside is dual-SIM. Keep your home number active on your physical SIM for calls and texts from family; load a Canadian data plan onto the eSIM for everything else — Maps, WhatsApp, hotel check-ins, the Parks Canada trail app you'll need in Banff. Both lines run simultaneously. Your home carrier never sees the data traffic, so the roaming charges that can hit $15–$20 per day simply don't apply to it.
Canada suits eSIM travelers particularly well for two reasons. First, Canadian spectrum licensing pushed all three major carriers — Rogers, Bell, and Telus — to build dense LTE and 5G infrastructure in the same urban corridors where most visitors spend time: Toronto's downtown core, Montréal's Plateau, Vancouver's West End, the Trans-Canada between Calgary and Banff. Second, the phones Canadians and their visitors already carry are almost universally eSIM-capable. Apple introduced eSIM support with the iPhone XS in 2018 and made the physical tray optional by iPhone 14. Google's Pixel line has supported eSIM since the Pixel 2. Samsung's Galaxy S21 and every flagship after it ships with dual-SIM eSIM support baked in (GSMA eSIM overview whitepaper).
What that means in practice: if you're traveling with an iPhone 13, 14, 15, or 16, a Pixel 6 or later, or a Galaxy S21 or later, your device is ready without any settings changes or carrier unlocking steps. You scan a QR code, the plan installs in under two minutes, and "CA Rogers" or "CA Bell" appears in your status bar before you've closed the Settings app.
One hardware caveat worth knowing: carrier-locked phones — typically bought on a payment plan directly from a US or European carrier — sometimes block eSIM profiles from foreign operators. This is not a Canada-specific issue, but it shows up more often than people expect. The fix is either unlocking the device through your home carrier (most will do this after the phone is paid off) or confirming unlocked status before you travel.
The technology itself is now a decade old and fully standardized under GSMA's SGP.22 specification, which governs how consumer eSIM profiles are provisioned and transferred. It is not a workaround or a beta feature. Airlines, hotel networks, and transit Wi-Fi spots treat eSIM-connected devices identically to physical-SIM devices, because to the network, there is no difference.
Canada's geography — 10 million square kilometers, with population clustered in a narrow band along the US border — means your data plan matters more than your SIM format. But starting with an eSIM removes one layer of friction: no airport kiosk queue at Pearson, no hunting for a convenience store in Montréal at midnight, no worrying about losing a tiny plastic card in a Jasper trailhead parking lot.
Canada's three main networks: Rogers, Bell, and Telus
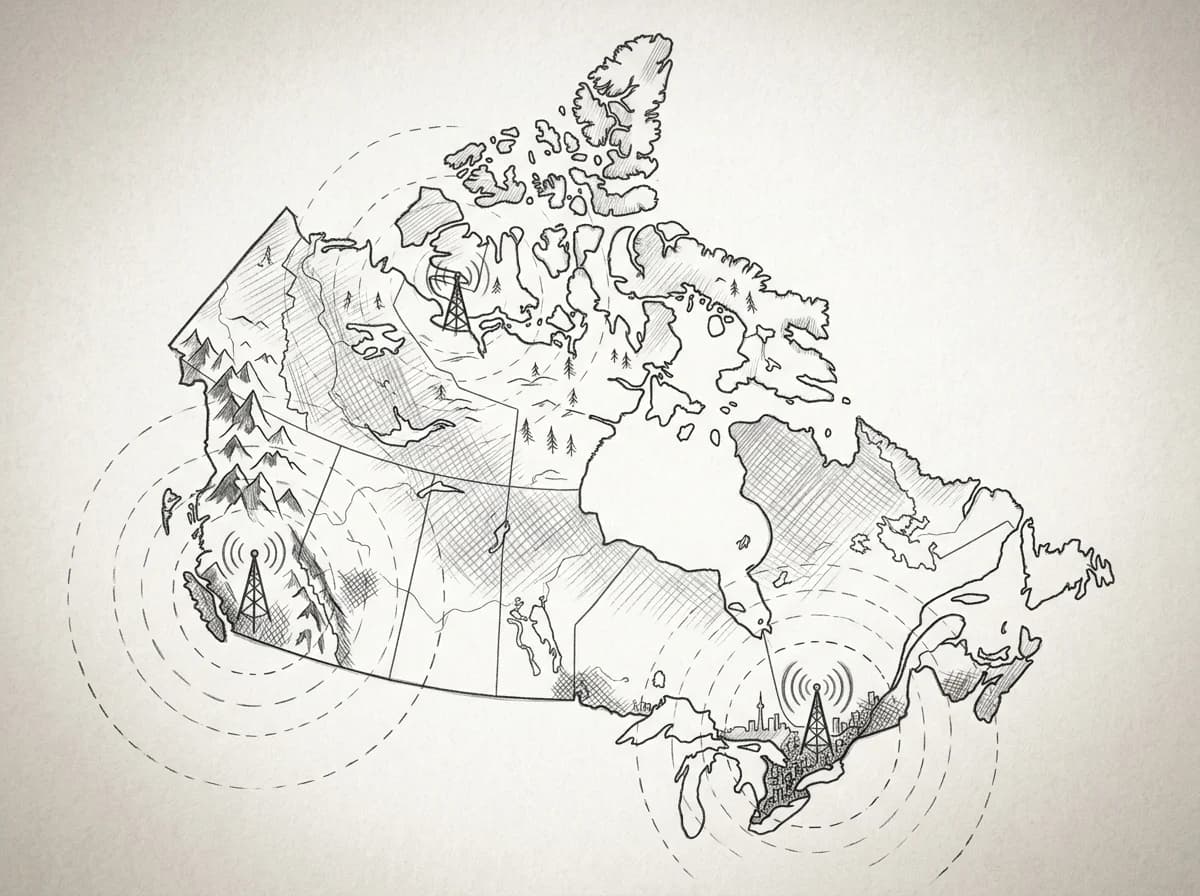
Canada has three national carriers. That's it. Rogers, Bell, and Telus carve up the country between them, and every eSIM provider selling "Canada coverage" is roaming on one of those three networks — sometimes two, rarely all three.
Understanding which MNO sits beneath your eSIM matters more in Canada than in most countries. The geography is brutal: 10 million square kilometres, with 90% of the population clustered within 200 km of the US border, leaving enormous interior stretches where only one carrier has towers — or none do.
Rogers runs the strongest urban 5G grid in Ontario and British Columbia, particularly in Toronto, Vancouver, and Calgary's downtown core. Its 3.5 GHz mid-band deployment gives you consistent 300+ Mbps in dense commercial areas. The problem is Rogers' rural footprint. Drive the Trans-Canada west of Wawa, Ontario, or east of Hope, BC, and Rogers LTE thins out fast. The network leans on 850 MHz for rural reach, but tower spacing on long highway corridors leaves genuine dead zones, especially in northern Ontario near Sudbury–Thunder Bay.
Bell is the best single-carrier choice for highway travel along the Quebec–Ontario corridor and Atlantic Canada. Its 700 MHz LTE blanket covers more of the Trans-Canada than Rogers mile for mile, and its 5G mid-band is live in Montreal, Ottawa, Toronto, and Halifax. Bell also owns significant rural infrastructure that predates the Rogers push into cities, which gives it better coverage on routes like Highway 1 through New Brunswick and parts of Nova Scotia that Rogers simply doesn't prioritize.
Telus dominates western Canada. For a trip centered on Banff, Jasper, Kelowna, or the Sea-to-Sky corridor between Vancouver and Whistler, Telus is the host MNO you want. Its 700 MHz and 850 MHz rural layers reach further into mountain terrain than either Bell or Rogers, and Telus has invested heavily in coverage along Highway 1 through the Rockies — you'll hold LTE signal for stretches that go completely dark on the other two. Median 4G LTE download speeds on Telus across Canada sit at 78.3 Mbps, compared to Bell's 82.1 Mbps and Rogers' 74.6 Mbps (Ookla Speedtest Intelligence Canada 2024).
For eSIM travelers, the practical question is not which carrier is "best" — it's which carrier the eSIM provider has roaming agreements with, and whether that matches your itinerary.
Practical rule: If your trip is Banff, the Okanagan, or anywhere in BC beyond Vancouver Island, find an eSIM that explicitly lists Telus as the host MNO. If your route is Toronto–Montreal–Quebec City, Bell or Rogers both work. Mixing a Rogers-hosted eSIM with a Jasper itinerary is the single most common connectivity mistake on Canadian mountain trips.
Most major eSIM providers in the Roamfly catalog disclose the host MNO on the plan detail page. If it isn't listed, ask before you buy. A plan showing "Canada coverage" without a named carrier could land you on whichever tower the provider's wholesale agreement happens to hit first — which on a Banff side road in October might mean nothing at all.

Practical rule: If your route includes the Trans-Canada between Kamloops and Calgary, choose an eSIM that roams on Telus or Rogers — not a reseller running on a single MVNO. Bell's footprint thins west of Golden, BC, and a 180-km dead zone starts where the Rockies begin.
5G coverage in Canada's major cities
Toronto's downtown core — King West, the Financial District, Bay Street corridor — runs on 5G. All three major carriers have dense mid-band deployments there, and on a good afternoon you'll see 300+ Mbps on a Bell or Rogers plan inside a coffee shop on Front Street.
The picture shifts the moment you leave the core. In the Toronto suburbs — Scarborough, Etobicoke, even parts of North York — 5G coverage becomes patchier, and LTE is still the working layer for most of those trips. The same dynamic plays out in every Canadian metro: a dense 5G ring around the CBD, then a gradual fade to LTE as you push toward the residential fringe.
Vancouver is arguably the best 5G city in Canada right now. Rogers and Telus have both pushed mid-band 5G (2.5 GHz and 3.5 GHz respectively) deep into the West End, Yaletown, and Gastown. Even the SkyTrain corridor from Waterfront to Broadway–City Hall holds a 5G signal for most of the ride. Opensignal's Canada Mobile Network Experience Report 2024 ranks Vancouver first among Canadian cities for 5G availability (Opensignal Canada Mobile Network Experience Report 2024) — meaning the percentage of time users actually connect to a 5G signal, not just whether towers exist (Opensignal Canada 2024).
Montreal is close behind. The Plateau, Mile End, downtown along Ste-Catherine, and the McGill corridor all deliver consistent 5G. Bell's mmWave deployments are limited to a handful of high-footfall blocks near the Palais des congrès, but sub-6 GHz coverage is broad enough that most travelers won't notice the gap.
Calgary punches above its size. The downtown grid — 8th Avenue SW, Stephen Avenue — is fully 5G, and the University of Calgary campus has strong Bell mid-band coverage. Calgary's sprawl works against it, though. The industrial northeast and the newer residential subdivisions in the southeast are still predominantly LTE.
Ottawa is the most uneven of the five. The ByWard Market, Rideau Centre, and Centretown have reliable 5G from all three carriers. Once you move toward Kanata or the suburbs along Hunt Club Road, mid-band 5G thins out and you're largely on LTE again. For a government-trip traveler spending the whole visit downtown, that's not a problem. For someone driving out to Gatineau Park or the surrounding region, plan on LTE speeds.
One consistent pattern across all five cities: indoor 5G performance depends heavily on the frequency band your host MNO is using. Sub-6 GHz (Rogers's 3.5 GHz, Telus's 2.5 GHz, Bell's 2.5 GHz) penetrates office buildings and hotel lobbies reasonably well. mmWave deployments — where they exist, mostly at transit hubs and arenas — drop off within meters of glass or concrete.
For an esim for canada travel user, the practical implication is simple: in any of these five cities, you'll get a 5G connection most of the day if you're moving between hotels, conference venues, and restaurants in the urban core. Expect LTE the moment a meeting takes you to a suburban campus or a client office in an outer borough. Neither is slow by global standards — Canadian LTE medians sit around 45–55 Mbps — but it's worth calibrating expectations before you land.
Rural and highway dead zones: what the maps don't show
The Trans-Canada Highway between Kamloops and Revelstoke has a stretch — roughly the 80 km west of Rogers Pass — where no carrier reliably fires. Not spotty. Off. The same is true for long segments of the Alaska Highway north of Fort St. John, and for most of the 300 km between Wawa and White River in northern Ontario.
Carrier coverage maps color these areas with signal. That's technically accurate: given clear line-of-sight and the right atmospheric conditions, you might catch a bar. Drive them at highway speed with your phone in a cupholder and you'll see airplane-mode conditions for 45 minutes at a stretch.
The gap between what the map shows and what your phone actually does comes down to three things: tower density, terrain, and the frequency bands your device uses. Canada's carriers have excellent sub-1 GHz coverage — the 700 MHz and 850 MHz bands that punch through hills and travel farther per tower — but tower spacing on secondary and tertiary highways often runs 60 to 90 km apart. That math doesn't work in the mountains.
Specific corridors where connectivity becomes unreliable for extended periods:
Trans-Canada, BC: Between Hope and Cache Creek, and again around the Fraser Canyon. Coverage threads through valleys and drops whenever the road climbs away from the river corridor.
Trans-Canada, northern Ontario: From roughly Sudbury east to Sault Ste. Marie is manageable. North of Lake Superior, between White River and Marathon, count on dead air for 90-minute windows.
Cabot Trail, Cape Breton: The inland sections of the loop — particularly between Cheticamp and Pleasant Bay — sit in terrain that simply doesn't get tower economics. Telus and Bell both map "extended coverage" here, which is carrier language for "maybe, if conditions are ideal."
Alaska Highway, BC and Yukon: Serviceable to Fort Nelson. North of there, meaningful signal appears at gas station clusters (Pink Mountain, Toad River, Muncho Lake) and drops to nothing in between. Plan for 120 km gaps.
None of this is unique to eSIM — a physical SIM on the same network performs identically. What changes with an eSIM for Canada travel is that you don't have the option of swapping to a local prepaid card in a gas station in Muncho Lake, because there isn't one. Your plan is your plan.
Practical rule: Download offline maps — Google Maps or maps.me — for any route that passes through northern Ontario, the Rockies, or anything labeled "highway" north of 57th parallel before you leave your last city. Set your navigation to offline mode at the start of each driving day. Signal will return; the map still needs to work when it doesn't.
For city-to-city flights, none of this matters. Vancouver to Calgary takes 70 minutes in the air, and both airports have full LTE within 50 meters of the arrivals door. The dead-zone reality is for anyone renting a car, joining an organized tour through Banff, or doing the self-drive Cabot Trail loop — which is a lot of visitors, and a detail that carrier marketing does not volunteer.
Practical rule: Download offline Google Maps for British Columbia and Alberta before you leave home. Between Rogers Pass and Revelstoke on Highway 1, you'll lose signal for stretches of 40–60 km where no Canadian carrier has towers.
How much data you actually need for a Canada trip
Most people guess wrong on data. They either buy too little, spend three days rationing maps through Banff, or buy a 50 GB plan for a long weekend in Vancouver and burn through six dollars of it.
The honest way to budget: work from hourly consumption figures, then multiply against your actual schedule.
Google Maps navigation pulls around 5–8 MB per hour when you're moving with the map actively rendering. Download your offline maps for the specific regions before you fly — the Trans-Canada corridor from Calgary to Vancouver is one GPX file in Maps, and it cuts your navigation draw to near zero. For cities, budget 5 MB/hour of active turn-by-turn.
Streaming is where the numbers jump. Spotify at standard quality runs about 40 MB per hour. Netflix on a mobile plan defaults to around 250–300 MB per hour at standard definition, closer to 700 MB at HD. A single two-hour flight delay spent watching anything at HD quality costs you 1.4 GB before you've even cleared customs at YVR.
Video calls on WhatsApp or FaceTime sit at roughly 180–300 MB per hour depending on video quality. A daily 20-minute check-in with home burns about 75–100 MB. Three weeks of those adds up to 1.5–2 GB on calls alone.
Social media and photo uploads are the sneaky drain. Posting one uncompressed iPhone photo to Instagram costs around 4–8 MB. Upload ten shots from a hike at Lake Louise and you've used 80 MB before the post even goes live. Video clips push that much higher — one 30-second Reel at full quality can run 60–90 MB.
With all of that in mind, here's how the math stacks by trip length:
7-day trip (Toronto or Vancouver, mostly urban): Assume 2 hours of navigation daily, 1 hour of streaming, two short video calls, and light social use. That's roughly 400–600 MB per day, or 3–4 GB for the week. A 5 GB plan covers it with room for a buffer.
15-day trip (mixed urban and national parks): Navigation demand goes up on highway days. Streaming bumps because evenings in Jasper or Québec City involve more downtime. Budget 600–900 MB per day. Target 10–12 GB minimum. A 10 GB plan is tight; a 15 GB plan is comfortable.
30-day trip (long stay, remote travel, hotspot use): Tethering a laptop even occasionally changes everything. A one-hour video conference over hotspot consumes 300–500 MB on top of your base usage. Budget 1–1.5 GB per day across all activity. You want 20–30 GB for real peace of mind.
One scenario that catches people off guard: the Icefields Parkway drive between Banff and Jasper. It is 230 kilometers of near-zero cell coverage. Download your Spotify playlist and your offline Maps tile the night before in Banff town. The data you save is irrelevant — the coverage simply doesn't exist for stretches of it.
The tier summary is straightforward. Under a week in a major city: 5 GB. Two weeks with parks and road trips in the mix: 15 GB. A month, or any trip involving regular laptop tethering: go to 20 GB or higher and don't look back.
Choosing between a 7-day, 15-day, and 30-day Canada eSIM plan
Three days at Niagara Falls and a month-long remote work stint from a Vancouver co-working space are both "Canada trips." The plan that makes sense for one is the wrong call for the other.
Start with the simplest filter: count your nights in-country, not your travel days. A flight in on Friday and out on Sunday is a 2-night trip, not a 7-day one. Canadian eSIM plans clock validity from the moment you activate — or in some cases from the moment data first touches the network — so every day of unused validity is money sitting on the table.
The 7-day window suits a long weekend in Toronto, a quick ski run at Whistler, or a Niagara Falls overnight that extends into Buffalo on the back end. Seven days covers most single-city itineraries with a buffer. The risk is tight timing: if your return flight is delayed by a day, you may clip the validity ceiling on day eight with no data left. If your trip has any flexibility in the back end, add two days of cushion to whatever you plan.
The 15-day window is the road-trip tier. Vancouver to Calgary via the Icefields Parkway, Montreal-Quebec City-Ottawa triangles, a Maritime loop from Halifax to PEI — these run 10 to 14 days for most travelers, which puts the 15-day plan in the right zone. You get breathing room on both ends without paying for a full month. The 15-day plan also suits conference trips: a day of pre-event arrival, four or five conference days, and a few recovery days for sightseeing after.
The 30-day window is for the sabbatical, the extended work relocation, or anyone spending more than three weeks in-country. The per-day cost is almost always lower here. If you're coworking from Calgary or doing slow travel through Nova Scotia, the 30-day plan absorbs day-count anxiety entirely — you stop watching the clock.
Practical rule: If your in-country nights land within three days of a validity tier's ceiling, buy the next tier up. The cost gap is smaller than the cost of being offline for the last leg of a trip.
One thing the validity window doesn't tell you is data volume. A 7-day plan with 3 GB will run dry on day four if you're streaming podcasts during a highway drive from Toronto to Ottawa (that's a five-plus-hour run with stretches of solid LTE). Cross-reference the GB ceiling with your actual habits: light navigation and messaging is roughly 200–300 MB per day, while mixed streaming pushes closer to 1 GB per day. A two-week road trip through Ontario and Quebec with heavy map use and occasional video calls needs closer to 10–12 GB minimum, not 5.
The math also shifts if you're tethering a laptop. A single workday of tethered Zoom calls can burn 2–3 GB on its own. If remote work is part of the picture, the 30-day plan's higher data ceiling usually makes more sense than buying a second 15-day plan mid-trip — you can't stack validity tiers, and a new plan activation mid-journey means a brief window of no service while the profile switches.
Trip type and nights on the ground will narrow the choice to one tier. Data volume seals it.

Practical rule: A 15-day plan beats two consecutive 7-day plans for trips of 10–15 days. Stacking short plans risks a validity gap overnight — your data expires at midnight on day 7, not at the hour you activated, and you wake up offline in Banff with nothing queued.
US-to-Canada border crossings: keeping one line active on both sides
Peace Arch moves about 14,000 vehicles a day. Most of those drivers lose either data or voice coverage for 10 to 40 minutes somewhere in the handoff zone — their home carrier's roaming either hasn't kicked in or they've shut it off to avoid a $15-a-day charge.
The dual-SIM approach fixes this cleanly. Keep your US eSIM active on SIM slot one for calls and SMS throughout the crossing; activate your Canada eSIM on SIM slot two for data the moment you're through the booth. Your phone handles both lines simultaneously, which means a WhatsApp call to your hotel in Vancouver doesn't drop while your navigation is already pulling Canadian maps.
The mechanics vary slightly by crossing. At Peace Arch (Blaine, WA to Surrey, BC), Canadian signal from Telus and Bell bleeds across the border by roughly 800 meters on the US side — your Canada eSIM may register a network before you've technically crossed. At the Ambassador Bridge between Detroit and Windsor, the coverage overlap is tighter because the river acts as a hard boundary; expect the handshake to happen mid-span, around the international midpoint. Niagara Falls crossings — Rainbow Bridge specifically — behave like Peace Arch: Canadian towers on the Clifton Hill side broadcast far enough that your Canada eSIM will pick up Bell or Rogers signal before the Canadian customs booth.
In iOS, go to Settings > Cellular > and assign each SIM a role. Set your US line as the default for calls and SMS, set your Canada eSIM as the default for cellular data. The phone will use both simultaneously without you toggling anything at the crossing. On Android, the path is Settings > Network & Internet > SIM cards — same logic, different menu labels depending on your device manufacturer.
One thing to watch: visual voicemail and iMessage blue-bubble delivery both depend on the line handling SMS. Keep that pinned to your US number. If you flip it to the Canada data-only eSIM and that plan doesn't include SMS (most Canada data eSIMs don't), you'll miss voicemail notifications until you flip it back.
Voice calls from Canada back to US numbers are where the setup pays off most. Your US eSIM handles them at whatever your existing plan charges — often free if you have an unlimited US plan — rather than at Canadian long-distance rates. Data-hungry tasks like turn-by-turn navigation, downloading offline maps of the Okanagan, or streaming music on the drive from Buffalo to Toronto all route through the Canada eSIM, which is where your gigabytes live.
If you're returning to the US later in the trip and want the same protection on the southbound crossing, Roamfly's 7-day US eSIM pairs directly with a Canada plan in this same dual-SIM configuration — useful for a long weekend loop between, say, Seattle and Whistler where you cross twice.
The one scenario dual-SIM doesn't solve: a single-SIM device or a phone that's carrier-locked to your US operator. In that case, you're choosing between data and voice at any given moment, not running them in parallel. Check your phone's specifications under "SIM card" before building this strategy around it.
iPhone and Canada eSIM: carrier lock, iOS settings, and known issues
Carrier lock is the issue most people discover at the worst possible moment — standing at the gate, QR code open, phone refusing to add a new plan. Before anything else, dial `*#06#` on your iPhone. The IMEI screen that appears will show "SIM Lock" status on iOS 14 and above; if it reads "No SIM restrictions," you're clear to proceed.
If you bought your iPhone outright — not through a carrier installment plan — it's almost certainly unlocked. Carrier-subsidized or financed phones are the problem cases. AT&T, T-Mobile, and Verizon all lock devices until the installment is paid off or an unlock request is approved, which typically takes 24–72 hours and requires a customer service call. Do this at home, not at Toronto Pearson.
The iPhone 14 and every model released after it in the US market is eSIM-only — no physical SIM tray at all (Apple Support — Use eSIM to connect to a cellular plan). That design choice makes eSIM mandatory rather than optional, but it also means Apple optimized the eSIM management interface for exactly this workflow. On those models, go to Settings → Cellular → Add eSIM → Use QR Code, then point the camera at Roamfly's QR code. The install takes under 30 seconds on a stable Wi-Fi connection.
On iPhone 13 and earlier, the path is the same but you have a physical SIM in tray one. iOS handles the coexistence cleanly: your home SIM stays active for your primary number, the Canada eSIM sits on the second line. Name the lines something legible — "Home" and "Canada Data" — or iOS will display the carrier names, which can look similar enough to cause accidental switching mid-trip.
Three activation errors appear frequently enough to be worth naming. First, "Unable to Complete Cellular Plan Change" almost always means your home carrier hasn't fully processed an unlock request, even if they told you it was done — wait an hour and retry. Second, a QR code that scans but stops at "Activating..." for more than two minutes usually resolves with a full restart, not just a settings app close. Third, "This eSIM cannot be installed on this device" is the carrier-lock message in disguise; no workaround exists except completing the unlock through your home operator.
iPhone models from XS onward support at least two eSIM profiles stored simultaneously, and iOS 16 introduced the ability to store up to eight on iPhone 13 and newer. That matters for frequent travelers: you don't need to delete a Canada plan after the trip. It sits dormant and can be reactivated on your next visit through Settings → Cellular → select the plan → Turn On This Line.
One setting travelers miss: after activation, check that the Canada eSIM is selected as the default for cellular data. Go to Settings → Cellular → Cellular Data and confirm the toggle points at your Canada line, not your home SIM. Running data through your home SIM against a Canadian tower is exactly how you end up with a $200 roaming charge the day after the eSIM was ready and waiting.
Android and Canada eSIM: Pixel, Samsung Galaxy, and others
The Samsung Galaxy S23 bought through AT&T in Dallas will, in many cases, refuse to install a third-party eSIM profile the moment you land at YVR. That single carrier-lock detail catches more Android travelers off guard than any other Canada connectivity problem.
The path into eSIM settings varies more on Android than on iOS. On a stock Google Pixel — the 6a, 7, 8, or 9 series — go to Settings > Network & internet > SIMs > Add SIM. Your phone will prompt you to scan a QR code or enter an activation code manually. The process takes under three minutes on a Pixel 8 if you have the QR code ready. Samsung Galaxy devices running One UI 5 or later follow a slightly different path: Settings > Connections > SIM manager > Add eSIM, then scan or enter the code. The tap sequence differs by One UI version, but both routes land in the same eSIM provisioning screen.
The carrier-lock issue deserves a precise description. When a US carrier subsidizes a Galaxy S22, S23, or S24 — or sells it on an installment plan — it can write a carrier policy to the device's eUICC (the embedded SIM chip) that blocks installation of any eSIM profile outside its own network ecosystem. This restriction is separate from the physical SIM lock and isn't always obvious until you try to install a profile abroad. Android's eSIM architecture does permit this kind of operator policy by design, as documented in the Android Developer documentation on eSIM profile management. The result: the profile download completes but activation fails, often with a vague "couldn't activate" error and no further explanation.
The clearest way to check before your trip is to contact your carrier and ask specifically whether "eSIM operator lock" or "eSIM policy restriction" is active on your account. AT&T removes the restriction after your device is fully paid off. T-Mobile's policy varies by plan. Verizon-locked Galaxy devices generally require a formal unlock request, which takes 24–48 hours to process. Do this before you pack.
Google Pixel phones purchased unlocked — from the Google Store or any retailer that sells the "unlocked" SKU — don't carry these restrictions. The Pixel 7a at $499 unlocked and the Pixel 9 at $799 both support multiple eSIM profiles simultaneously, meaning you can keep your US number active on one profile and run a Canada data plan on a second without swapping anything. That dual-eSIM capability is one reason frequent cross-border travelers often gravitate toward Pixels over carrier-purchased Galaxies.
OnePlus, Motorola, and Xiaomi devices sold in North America have mixed eSIM support. The OnePlus 12 and Motorola Edge 50 Pro support eSIM. Many mid-range Motorola models sold through US carriers do not. Check your device's spec sheet under "SIM" — the listing will say "Nano SIM + eSIM" if it's supported, or simply "Dual Nano SIM" if it isn't.
One other Android-specific note: some older Android 10 and 11 devices have an eSIM chip but limited software support for remote provisioning. If your phone is more than four years old, confirm eSIM compatibility in settings before counting on it for the trip.
When to activate your Canada eSIM — before, during, or after landing
Activating at home, the night before departure, is almost always the right call. You're on your own Wi-Fi, your phone has full signal, and the QR code scan takes about 45 seconds. Trying to do the same thing while standing in a customs line at Pearson — tired, phone in one hand, passport in the other — is how people make mistakes.
The mechanics matter here. eSIM installation requires an internet connection to pull the profile from the carrier's provisioning server, so you need either Wi-Fi or a live cellular connection at the moment you scan. At home, that's a given. At 35,000 feet, it isn't — most in-flight Wi-Fi services block the kind of background data transfer the eSIM provisioning protocol uses, and even when they don't, mid-flight activation has a meaningful failure rate because of intermittent drops during the handshake. If the download stalls partway through, you can end up with a corrupt profile that needs manual deletion before you can try again.
That said, life doesn't always allow a calm pre-departure setup. If you're activating on arrival, both YYZ (Toronto Pearson) and YVR (Vancouver International) have free public Wi-Fi in the international arrivals hall — before you clear customs, not after. At YYZ, the network appears as "Toronto Pearson Airport Wi-Fi" in Terminal 1 and Terminal 3. At YVR, it's "YVR Free Wi-Fi" in the international terminal. Both are stable enough for eSIM provisioning; neither requires an account or email signup. Find a seat near a pillar if you want a stronger signal — the open-floor areas near baggage claim tend to drop below the threshold that makes provisioning reliable.
One nuance on timing: installing the profile and activating service are two separate steps in most eSIM setups. You can install the profile at home, then set the plan to active only when your plane lands. That approach gives you the reliability of home Wi-Fi for the heavy lifting, with the flexibility to flip the switch at exactly the right moment. Check whether your specific plan requires activation before a set date — some 7-day plans start the clock on installation, others on first use.
Practical rule: Install the eSIM profile at home on your own Wi-Fi, then leave it in standby mode. Switch it to active on the jet bridge or during taxi — your phone connects the moment you hit Canadian cell towers, without burning any of your plan's validity in the air.
Post-arrival activation, past customs and into the arrivals hall, is the weakest option. By that point you're relying on the airport's public Wi-Fi in a crowded terminal, often with hundreds of other arriving passengers doing the same thing. It works, but it's slower and less predictable than either of the first two approaches. Reserve it for situations where something went wrong — a corrupted QR code, a device compatibility check you forgot to run before leaving home, or a last-minute plan switch. In those cases, the airport Wi-Fi at YYZ and YVR will get you through; just expect to stand still for two to three minutes while the profile loads rather than the near-instant install you'd get at home.
Practical rule: Scan the QR code and complete activation at home over Wi-Fi, not at YYZ or YVR. Both airports offer free Wi-Fi, but terminal congestion at Pearson's Terminal 1 can make the activation handshake fail — and there's no faster fix than just doing it before you board.
Hotspot and tethering: sharing your Canada eSIM with a laptop
Hotspot works on every Roamfly Canada plan — but how well it works depends on which tier you pick.
The base 3 GB / 7-day plan supports tethering, and for a quick business trip where you're just pulling Slack messages through your MacBook at a Montreal café, 3 GB is borderline. Factor in a single video call and you're watching that number shrink fast. The 10 GB / 30-day plan is the sensible floor for anyone who needs a laptop online for more than an hour a day.
Throttle thresholds are where plans diverge. Most of the mid-tier Canada packages hold full speed up to their stated data cap, then drop to 512 kbps — enough for email and basic web, not enough for video conferencing or large file transfers. A few of the higher-tier plans (15 GB and above, 30-day validity) carry a hard cap rather than a throttle, meaning the line simply stops passing data once the bucket empties. Check the plan detail page before you buy if you're planning to run a remote desktop session from a Vancouver Airbnb.
The tethering math changes depending on what's sharing the connection. A single laptop streaming a 1080p YouTube video burns roughly 2 GB per hour. Add a second device — a tablet, a travel router for a shared apartment — and a 10 GB plan disappears in two solid work days. Digital nomads booking a week in a Gastown coworking space should budget at minimum 1.5 GB per working day for mixed laptop use, which puts a 15 GB / 30-day plan at the bottom of the comfort range.
One scenario where tethering earns its keep: the stretch of the Trans-Canada between Calgary and Banff has spotty fixed broadband at roadside lodges, but Rogers LTE pulls surprisingly well along that corridor. Tethering a laptop for a late-evening sync while staying somewhere that sells "WiFi included" as a selling point but delivers 4 Mbps shared across eight cabins is a genuine use case, not an edge one.
Practical rule: If your primary goal is laptop data — not phone browsing — treat your phone's stated plan data as your laptop's budget, not a combined figure. Hotspot doesn't create extra capacity; it redistributes what you have across more hungry devices.
One edge case worth flagging for business travelers: data-only eSIM plans don't include SMS or voice, which means two-factor authentication codes sent by text won't arrive on that line. Keep your home SIM active in slot 1 specifically for those messages while the Canada eSIM handles all the heavy data in slot 2. That dual-SIM split is the cleanest setup for anyone running a laptop off tethered Canadian data while staying reachable on their regular number.
Canada eSIM vs local SIM card at the airport kiosk
The Rogers prepaid kiosk at Toronto Pearson Terminal 1 sits past baggage claim, before the taxi stand — and on a Friday afternoon in July, the queue runs 20 minutes minimum. That wait costs you something real: the meter on your ground transport is running, your family is texting on iMessage without delivery, and your phone is still dark.
Set the queue aside and look at the math. A Rogers prepaid SIM at that kiosk runs roughly CAD $45 for 5 GB over 15 days. At current exchange rates that's around USD $33. Staff will ask for a piece of government ID in most cases, hand you a physical card, and then you still need to pop the SIM tray — harder than it sounds after a red-eye with swollen fingers and no SIM tool in reach.
A comparable eSIM for Canada travel lands differently. You install it before departure, often for USD $15–25 for the same 5 GB / 15-day window depending on the plan, and activation is a QR scan that takes under three minutes. No queue, no ID check, no SIM tray. The savings are real, but convenience is the more honest selling point for most travelers.
Coverage is the counterargument you'll hear from kiosk staff. Rogers sells its own network directly, so your SIM runs natively on Rogers infrastructure. Most Roamfly Canada plans also use Rogers (or Bell, or Telus) as the host MNO — the difference is negligible in Vancouver, Calgary, or Montreal. The carrier name in your status bar may say "Rogers" either way.
Where the physical SIM holds a genuine edge: voice and SMS. Airport kiosk prepaid cards typically include a Canadian phone number with calling minutes and SMS built in. Most eSIM data plans are data-only, which means WhatsApp calls work fine but your Canadian number for booking restaurant reservations or rental car pickups won't exist. If you need a local Canadian number, layer a VoIP app on top of your data eSIM rather than buying a kiosk SIM to solve that single problem.
The cross-border question cuts the other way. If your trip crosses back into the US — a Niagara Falls day trip, a Vancouver-to-Seattle drive — a Rogers prepaid SIM goes dark the moment you leave Canadian territory unless you add a US roaming bolt-on, which Rogers charges separately. An eSIM keeps you on Canadian data while your home SIM in slot 1 picks up the US network automatically, with no plan changes and no extra cost beyond your normal US plan.
One category where the kiosk genuinely wins: last-minute travelers who skipped everything and land with no plan. If you're in that situation, the kiosk works. Pay the premium, accept the queue, and get moving. For everyone who reads this before boarding, the case runs the other direction.
Practical rule: If your trip is data-only and crosses back into the US even once, an eSIM paired with your home SIM in dual-SIM mode is the cleaner setup. The kiosk SIM earns its price only when you need a Canadian number for the duration of the stay.
Canada eSIM vs international roaming from your home carrier
The math on carrier roaming is brutal once you run it against an actual itinerary. A week in Montreal with Verizon TravelPass costs $70 — $10 for each of seven days you touch the network, regardless of whether you use 50 MB or 5 GB that day. AT&T's International Day Pass runs $12 per day, so the same week lands at $84. Neither plan offers a "light usage" discount; the meter starts the moment your phone registers on a Canadian tower.
T-Mobile handles it differently. Go5G Plus and Magenta MAX customers get unlimited data in Canada included, which sounds like a decisive win — and for frequent Toronto day-trippers, it probably is. The catch is throttling: T-Mobile's Canada data is capped at 256 kbps once you leave the included allotment on lower-tier plans, and even on Go5G Plus, video is restricted to 480p abroad (Verizon TravelPass Canada pricing). For navigation, messaging, and email that's tolerable. For uploading footage from Banff or running a video call with a client in Calgary, it's a friction point you'll notice.
Now stack that against a typical Canada eSIM. A 10 GB / 30-day plan runs roughly $18–$22 depending on the provider. A 5 GB / 15-day plan sits closer to $12–$14. Per-gigabyte cost lands between $1.50 and $2.20 — compared to roughly $10–$12 per day on TravelPass or the Day Pass, where a heavy-use traveler might blow through 2–3 GB and still pay the same flat daily rate as someone who barely opens Google Maps.
Here's the full comparison in one place:
| Option | Cost | Data | Best for |
|---|---|---|---|
| Verizon TravelPass | $10 / day | "Domestic speeds" (throttled after high usage) | Short trips, Verizon diehards |
| AT&T International Day Pass | $12 / day | Domestic allowance shared | Infrequent Canada trips |
| T-Mobile Go5G Plus | Included | Unlimited, 256 kbps throttle cap | Frequent US–Canada commuters |
| Canada eSIM (10 GB / 30 days) | ~$20 flat | 10 GB at full LTE/5G speeds | Most leisure travelers |
| Canada eSIM (5 GB / 15 days) | ~$13 flat | 5 GB at full LTE/5G speeds | Week-long trips |
The roaming plans carry one real advantage: your existing number stays active. You receive calls and texts on your US number without configuring anything. If you're expecting time-sensitive calls from clients or family who have your regular number, that matters.
The eSIM answer to that gap is dual-SIM. Keep your US physical SIM active for calls and texts, run the Canada eSIM as the data line, and set mobile data to pull from the eSIM. Your US carrier still bills for incoming calls (check your plan), but you're not paying $10–$12 a day for data you could get for $1.80 per gigabyte.
For a seven-night trip — Vancouver, Whistler, a day in Victoria — the numbers read like this: TravelPass at $70 versus an eSIM at roughly $13–$20. The difference funds a decent dinner on Granville Island. Over a two-week trip, TravelPass or the Day Pass at $98–$168 versus an eSIM at $18–$22 isn't even a close call.
The roaming option wins only if you're crossing for less than 24 hours and the per-day fee is lower than the eSIM's flat cost — think a single afternoon at Niagara Falls from the US side, where paying one $10 TravelPass day beats buying a 7-day eSIM you'll barely use.
Specialty trips: Banff, the Yukon, and cruise ports
Banff townsite has surprisingly solid Rogers LTE — standing on Banff Avenue outside the Fairmont, you'll pull 40–60 Mbps on a busy July afternoon. That coverage story ends the moment you drive 20 minutes north toward Lake Louise, and it collapses entirely once you're hiking the Icefields Parkway past Bow Lake. Expect no signal from roughly the Saskatchewan River Crossing to Jasper, a stretch of 144 kilometres with no towers at all.
The practical split for Banff visitors is this: everything within the townsite and the main Lake Louise parking area works on Rogers-hosted eSIMs; anything requiring a trail head more than 5 km from the highway does not. Moraine Lake Road, the Plain of Six Glaciers, and the Skoki Valley backcountry are all dead zones regardless of which Canadian carrier your eSIM rides. Download offline maps on Google Maps or Maps.me before you leave the hotel. Your eSIM data budget won't matter if the signal isn't there to use it.
The Yukon is a different category entirely. Whitehorse is covered — Bell and Rogers both run reliable LTE through downtown and along the Alaska Highway corridor as far as Haines Junction, roughly 160 km west. Past that, you are in one of the largest communication dead zones in North America, and no eSIM plan changes that reality. The Klondike Highway from Whitehorse to Dawson City (535 km) has scattered signal near communities like Carmacks and Pelly Crossing, but gaps of 80–100 km between usable coverage are normal. If the Yukon is your destination, buy a satellite communicator for safety. An eSIM covers your Whitehorse logistics; it does not cover the wilderness.
Cruise travelers using Vancouver and Halifax terminals face a different set of questions. Both terminals sit well inside urban coverage — Vancouver's Canada Place is blanketed by Rogers 5G, and Halifax's Seaport district has strong Bell LTE. The issue is timing and geography: your ship docks in Vancouver, you have a shore day, and then you sail north toward Ketchikan or Juneau. Once you're in Alaskan waters, your Canadian eSIM is not active. It cannot roam to US carriers without a separate US-capable line. Passengers frequently burn through whatever data they had open on the Canadian plan before realizing they've crossed into US coverage territory.
Halifax departures heading to Bermuda or the Caribbean hit a similar wall: Canadian coverage drops off 20–30 nautical miles from shore. In port at Nassau or Hamilton, you need a local or regional plan, not your Canada eSIM.
The cleaner approach for cruise itineraries touching multiple countries is to treat the eSIM for Canada travel as a pre-embarkation tool — activate it for your Vancouver or Halifax layover days, use it heavily at the terminal for logistics, and switch to ship Wi-Fi or a regional plan once you board. Most 7-day Canada eSIM plans are sized exactly for that use case: a few gigabytes across two or three days of city connectivity before departure.
One note for Banff visitors arriving via Calgary: YYC has strong Rogers coverage throughout arrivals, and the TransCanada highway west to Banff is fully covered. Your eSIM will be active and useful the whole drive in. Enjoy that window — it ends at the park's backcountry trailheads.

Business travelers: calling, SMS, and Canada eSIM data-only limits
Three days into a Toronto conference with back-to-back client meetings, you realize your two-factor authentication codes are routing to your US number — and your data-only eSIM can't receive them.
That single scenario defines the business traveler's core tension with eSIM for Canada travel. Data-only plans are structurally what they say: they carry IP traffic, not a PSTN phone number. No inbound SMS. No native calls. Rogers, Bell, and Telus all assign a DID (direct inward dial) number when you buy a local SIM at a store — eSIM data plans skip that step entirely.
The practical ceiling here is real. If your bank, Salesforce login, or corporate VPN sends verification codes by text to a specific number, that number needs to receive SMS. A data-only Canada eSIM won't intercept those messages. Your US or home SIM — kept on the secondary slot in a dual-SIM phone, or switched to Wi-Fi calling only — remains the only reliable path for that authentication chain.
For actual voice communication, the workaround stack is solid. WhatsApp calls over LTE run smoothly on any plan with 1 GB or more headroom, and a 15-minute video call with a client in Vancouver consumes roughly 90–120 MB. Google Voice gives you a persistent US number that rings over data — useful if colleagues need to reach you at a number they already have saved. Skype still handles inbound calls to a Skype number for a few dollars a month, and the audio quality on Canadian LTE is indistinguishable from a cellular call in most boardrooms and hotel lobbies.
SMS alternatives are messier. iMessage covers Apple-to-Apple threads automatically over data. WhatsApp and Signal handle the rest if your contacts use them. The gap is anyone who sends a plain SMS to your number expecting a reply — a client confirming a lunch spot, a rideshare driver sending a PIN code, a hotel front desk texting your room assignment. Those go to your home SIM, which works fine if you keep it active in the background on Wi-Fi calling.
One category of travelers should think hard before going data-only: anyone whose company uses Microsoft Teams Phone or Cisco Webex Calling with a direct extension. Both platforms deliver calls over data and work normally on a Canada eSIM. If your organization already routes desk-phone calls through Teams, you effectively have a full calling solution the moment your data connection is live. The SIM-number gap doesn't apply.
For everyone else, the dual-SIM setup is the honest answer. Keep your home carrier SIM alive — airplane mode off, data roaming off, Wi-Fi calling on — for SMS and authenticator codes. Run the Canada eSIM as the data line. Calls go through WhatsApp or your VOIP app of choice. The configuration takes about four minutes to set up at the gate before you board, and it costs nothing beyond whatever you're already paying your home carrier for line access.
The practical ceiling to remember: a data-only eSIM is a data pipe, not a phone line. For most business travel that's enough, provided you've planned the authentication and reachability gaps before you're standing at a hotel check-in desk in Calgary needing a code you can't receive.
Pairing your Canada eSIM with a US plan for cross-border trips
The Detroit–Windsor tunnel takes about four minutes to drive. Your phone, switching between US and Canadian towers mid-crossing, takes longer — sometimes not completing the hand-off until you're already downtown. That lag is the core problem with running a single eSIM on a loop trip that crosses the border more than once.
The cleaner setup is two eSIMs running simultaneously: your Canada eSIM handling data once you're north of the border, a US plan picking it back up the moment you re-enter. Most modern dual-SIM phones — the iPhone 13 and later, Samsung Galaxy S22 series and above, Google Pixel 7 and newer — support two active eSIM profiles at once. You don't swap profiles manually every time you cross. Instead, you set each eSIM to "Data Switching" in your carrier settings and let the phone route automatically to whichever network has signal.
The selection logic works like this: when your Canada eSIM loses Bell or Rogers signal and your US eSIM picks up AT&T or T-Mobile near the border, the phone hands off data without intervention from you. In practice it's not always instantaneous — budget 60 to 90 seconds of degraded connectivity at the crossing itself — but it's far cleaner than fumbling through settings at the Ambassador Bridge with a lineup behind you.
For the US side, the plan length depends on how your trip is structured. A single crossing — say, flying into Buffalo, driving to Toronto for five days, flying home — doesn't need much US coverage time. But a loop that takes you from New York through Montreal and back, or a Pacific route from Seattle up to Vancouver and back down, benefits from having a 30-day US plan running in the background for the full duration rather than a short-validity plan that expires mid-trip. Roamfly's US 30-day plan fits that second pattern well; it stays live across the entire loop without requiring you to repurchase mid-trip.
One configuration detail that catches people: on iPhone, go to Settings > Cellular and confirm that your Canada eSIM is designated as the "Primary" for data when in Canada, with "Allow Cellular Data Switching" turned on. If that toggle is off, the phone won't fall back to your US eSIM when you cross back south. Android handles this differently by carrier line label — in Network & Internet settings, assign each SIM a preferred network type and confirm the data SIM priority order.
Calls and SMS are a separate matter. Both eSIMs here are data-only, so voice routing still goes through whatever app you're using — WhatsApp, FaceTime Audio, Google Meet. The cross-border setup doesn't change that. What it does change is that you stay on LTE or 5G data continuously instead of dropping to a buffering edge-network handoff at the border.
The main mistake on loop trips is treating the US plan as an afterthought. Your Canada eSIM for travel is the headliner, but without a live US plan underneath it, every border re-entry turns into a manual reconnection task. Running both removes that friction entirely.
Get connected before you leave
Activation takes under five minutes, and you can do it from your couch tonight.
There's no physical card to wait for, no post office trip, no airport kiosk queue behind a family of six with three checked bags. You scan a QR code, confirm the install, and your phone has a working Canadian number line ready to go the moment your flight starts its descent into YYZ or YVR.
The one thing worth doing before you land: buy and install the plan now, while you're on a stable Wi-Fi connection. The QR code delivery is instant. Installation on most iPhones takes about 90 seconds. You don't need to activate it yet — just have it sitting in your eSIM tray, ready. Then the moment the wheels touch down at Pearson or Vancouver International, you flip it on before you even reach the gate.
That sequence matters because Canadian airport Wi-Fi is a coin flip. Pearson's Terminal 1 free network drops packets constantly at peak arrival times. If you're counting on airport connectivity to complete your eSIM setup, you're adding avoidable friction to a trip that hasn't started yet.
Roamfly carries plans built specifically for Canadian networks — Rogers, Bell, and Telus coverage, depending on which tier you choose — with validity windows from 7 days up to 30. A short weekend trip to Montreal or a drive up the Sea-to-Sky to Whistler fits a 7-day plan cleanly. A two-week loop through Alberta's national parks calls for the 15-day. If you're spending a full month hopping between Vancouver, Toronto, and the Maritime provinces, the 30-day plan removes any clock-watching.
No plan automatically renews. No surprise charges hit your card when the validity window closes. You use what you buy, and if you need more, you top up.
The eSIM for Canada travel section of the catalog is updated when carrier agreements change, so the plan you're looking at reflects current host-network access — not a stale listing from two seasons ago.
Ready to get connected? Roamfly's Canada eSIM ships in under 5 minutes.
One last practical note: if you're crossing between the US and Canada on the same trip, review the cross-border pairing section above before you check out. Some plans cover data on both sides; others are Canada-only. Picking the right structure before you buy saves you from juggling two active eSIMs at the border.
Ready to get connected? Roamfly's canada eSIM ships in under 5 minutes.
Frequently asked questions
Does my phone support eSIM in Canada?
iPhones from XR (2018) onward, every Google Pixel from 4 onward, and Samsung Galaxy S20+ flagships all support eSIM on Canadian networks. To confirm, go to Settings → General → About → Available SIM on iPhone, or Settings → Connections → SIM Manager on Samsung. If you see an option to add a digital SIM, your device is ready.
Can I use a Canada eSIM if my iPhone is carrier-locked?
A locked iPhone won't accept a foreign eSIM — the carrier lock overrides the digital SIM slot. Check your status in Settings → General → About → Carrier Lock. If it reads 'SIM Lock: Locked', contact your home carrier to unlock before you leave; most US and UK carriers do this for free after 30–90 days of active service.
How fast can I activate after landing at Toronto Pearson or Vancouver International?
Under 5 minutes if you scanned the QR code before boarding while still on home Wi-Fi. The eSIM sits dormant until your phone exits airplane mode inside Canada, then latches onto a host network — Rogers, Bell, or Telus depending on the plan — automatically. No airport kiosk, no queue.
Does a Canada eSIM include hotspot tethering?
It depends on the plan tier. Roamfly's Canada plans that include tethering specify it explicitly in the plan details. Data-only plans without a hotspot flag will block the feature at the carrier level regardless of your phone's hotspot settings. Check the plan description before purchasing if sharing data with a laptop is a priority.
Will my Canada eSIM work in national parks like Banff or in rural areas?
Coverage in Banff townsite is solid on Rogers and Telus LTE, but signal drops sharply past the Bow Valley Parkway and on the Icefields Parkway north of Lake Louise. The Yukon and northern Ontario have stretches of 200+ km with zero coverage from any Canadian MNO. Download offline maps in Google Maps or Maps.me before leaving cell range.
Can I keep my US number active while using a Canada eSIM for data?
Yes, if your phone is dual-SIM. Set your US physical SIM as the default for calls and SMS, and assign the Canada eSIM to cellular data only. On iPhone, go to Settings → Cellular → and toggle each line's role. Your US contacts reach you on the same number; data routes through the Canada plan at local rates instead of roaming.
What happens if my Canada eSIM runs out of data mid-trip?
Most Roamfly Canada plans pause data rather than charge overage automatically. Top up through the Roamfly app — the additional data activates within 60 seconds and restores the same connection without scanning a new QR or reinstalling the eSIM. If the plan's validity window has already expired, you'll need to purchase a new plan.
Do I need to remove my physical SIM to use a Canada eSIM?
No. eSIM runs on a separate digital slot that coexists with your physical SIM. Leave your home SIM in place for calls and texts, and let the Canada eSIM handle data. The only exception is older single-SIM Android devices that don't support simultaneous SIM + eSIM operation — check your manufacturer's spec sheet if unsure.